Data Management
File Management
"Data Management > File Management" is available when the business scope is Training + Inference or Training.
File Data Display
File data supports two display modes: list and thumbnail.
- Click "File Management" to view the user directory, public directory, and sample data. The default is list mode, displaying the user directory file list. The public directory includes global and group shares. The file list items for both user and public directories include Name, Owner, Type, Size, and Creation Time. The data display in list mode is shown below:
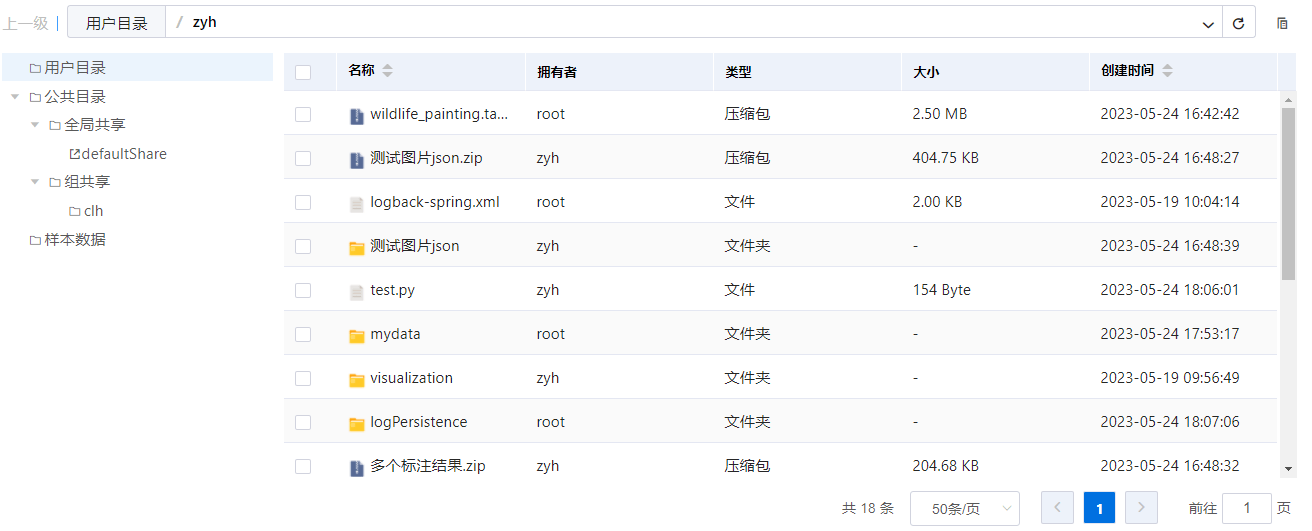
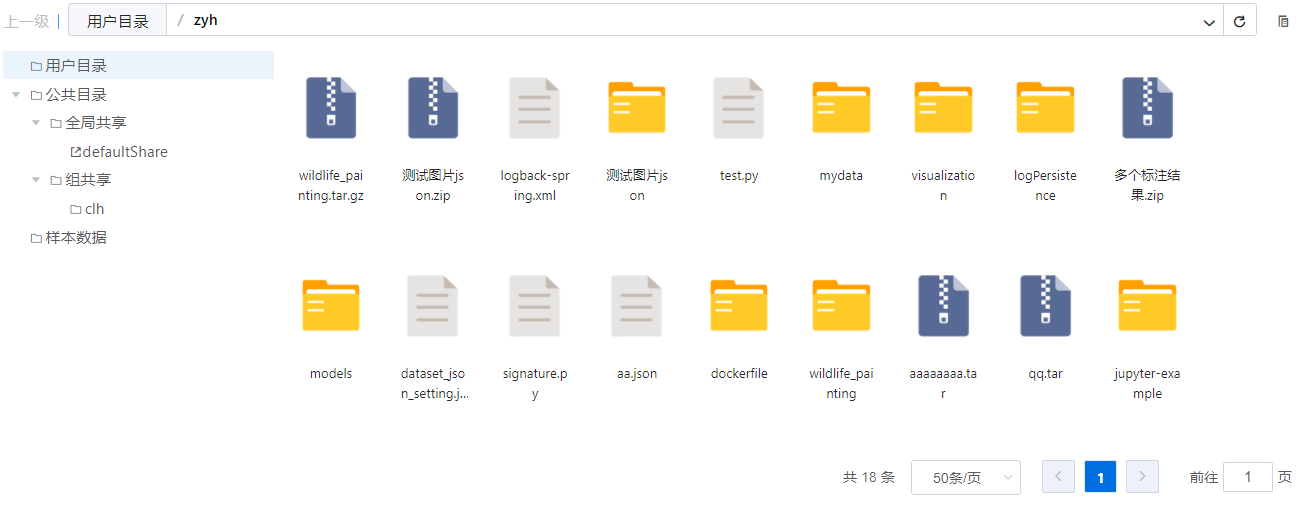
Click the mode switch icon in the upper right corner to switch to thumbnail mode, as shown below:

The data display in thumbnail mode is shown below:
The user directory in File Management can connect to multiple storage systems. The directory tree on the left displays storage names hierarchically, as shown below, with the primary storage displayed first.

- Above the path navigation bar are quick file operation buttons, including Upload, New, Copy To, Rename, Delete, and More. Clicking More reveals additional file operation buttons.
- Click a folder under "File Management > Public Directory" to display global and group shared files. Standard users can view files in their assigned public directories. The global share contains a default "defaultShare" directory. Administrators can set directories as public under global share, allowing standard users to view them. Standard users have only one group share directory, corresponding to their bound user group, with the file name matching the user group name.
- Click a folder under "File Management > Sample Data" to display the sample data directory. Users can view the file list and files (including regular files, images, audio, and video), and search for files and paths, but cannot perform other operations.
Sample data in File Management can connect to multiple storage systems. The directory tree on the left displays storage names hierarchically, consistent with the user directory multi-storage display, with the primary storage displayed first.
System administrators add sample data backup storage via the "System Management > Storage Settings" page. Users can then use the public sample data files from the newly added storage in other platform modules.
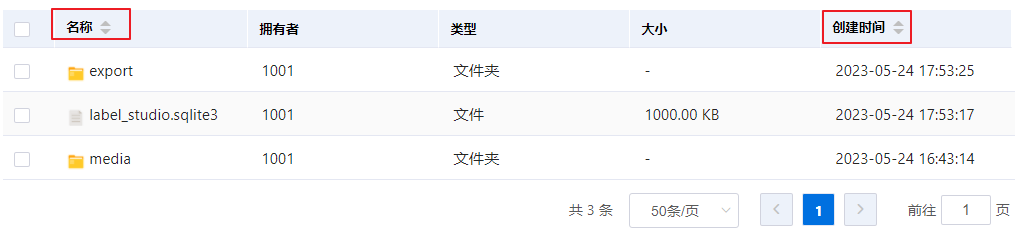
When the sample data permission switch is enabled, only sample data directories authorized for the user are displayed. Note that when this switch is enabled, sample data in backup storage also requires authorization by the system administrator before use. - In list mode, you can sort by Name and Creation Time in ascending or descending order using the column headers. Sorting is supported for user directories, global share directories, and group share directories, but not for sample data.
New File
- Click the New shortcut above the path navigation bar to create a new file in the user directory.

- The New File dialog appears. Enter a valid filename (consistent with new folder constraints) in the Name field. Click OK; the page automatically refreshes to display the new file.
New Folder
- Click the New shortcut above the path navigation bar to create a folder in the user directory.

- The New Folder dialog appears. Enter the folder name in the Name field. Only Chinese characters, English letters, numbers, dots, underscores, and hyphens are allowed. Names cannot start with a hyphen or dot.

- Enter a valid folder name and click OK. The page automatically refreshes to display the newly created folder.
View
Supports viewing regular files, images (png, jpeg, jpg, bmp), audio files (mp3, wav, flac), and video files (mp4, avi, flv, mov). Supports viewing regular files and images under 50MB, audio files under 50MB by default, and video files under 100MB by default.
View Regular Files
In the file display area, select a file, right-click, and click View from the context menu, or double-click to view the file content.
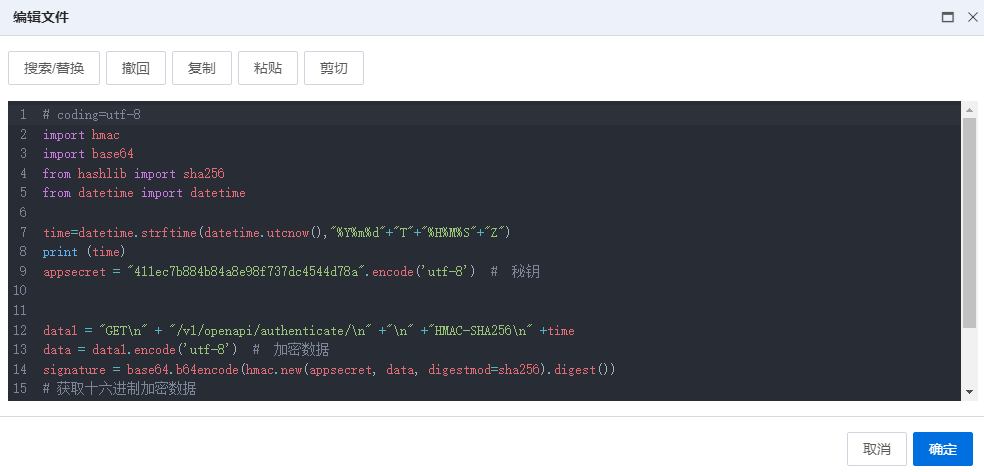
The Edit File dialog appears, allowing file editing. The editor supports search/replace, undo, copy, paste, and cut. Click OK to save.
View Images
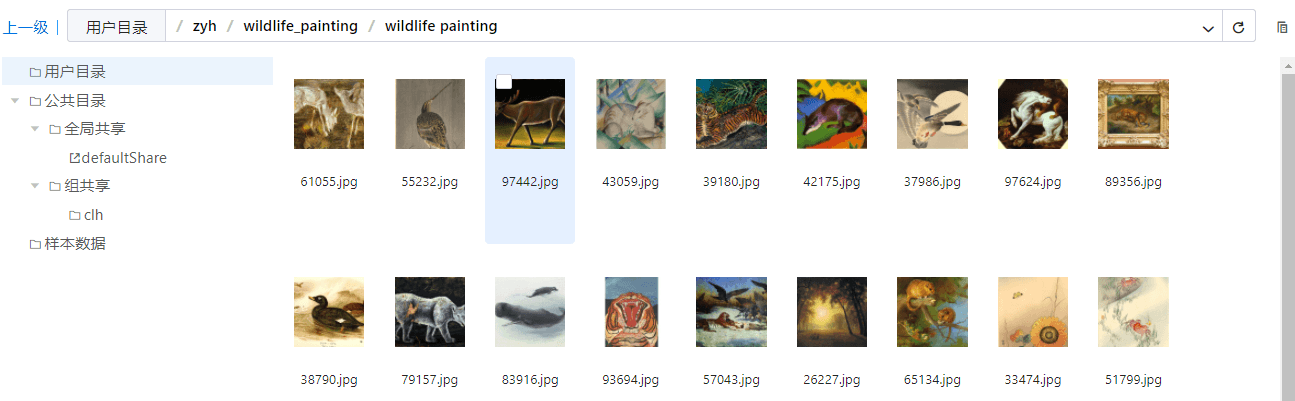
Supports double-clicking or clicking the View button to view images. Supports viewing regular images and annotated images. Opened images support zooming. Supports navigating to previous/next images on the current page by clicking left/right arrows or using keyboard arrow keys. When reaching the last image, clicking Next loops back to the first image on the current page, as shown below:

Thumbnail mode displays thumbnails of regular images, as shown below:
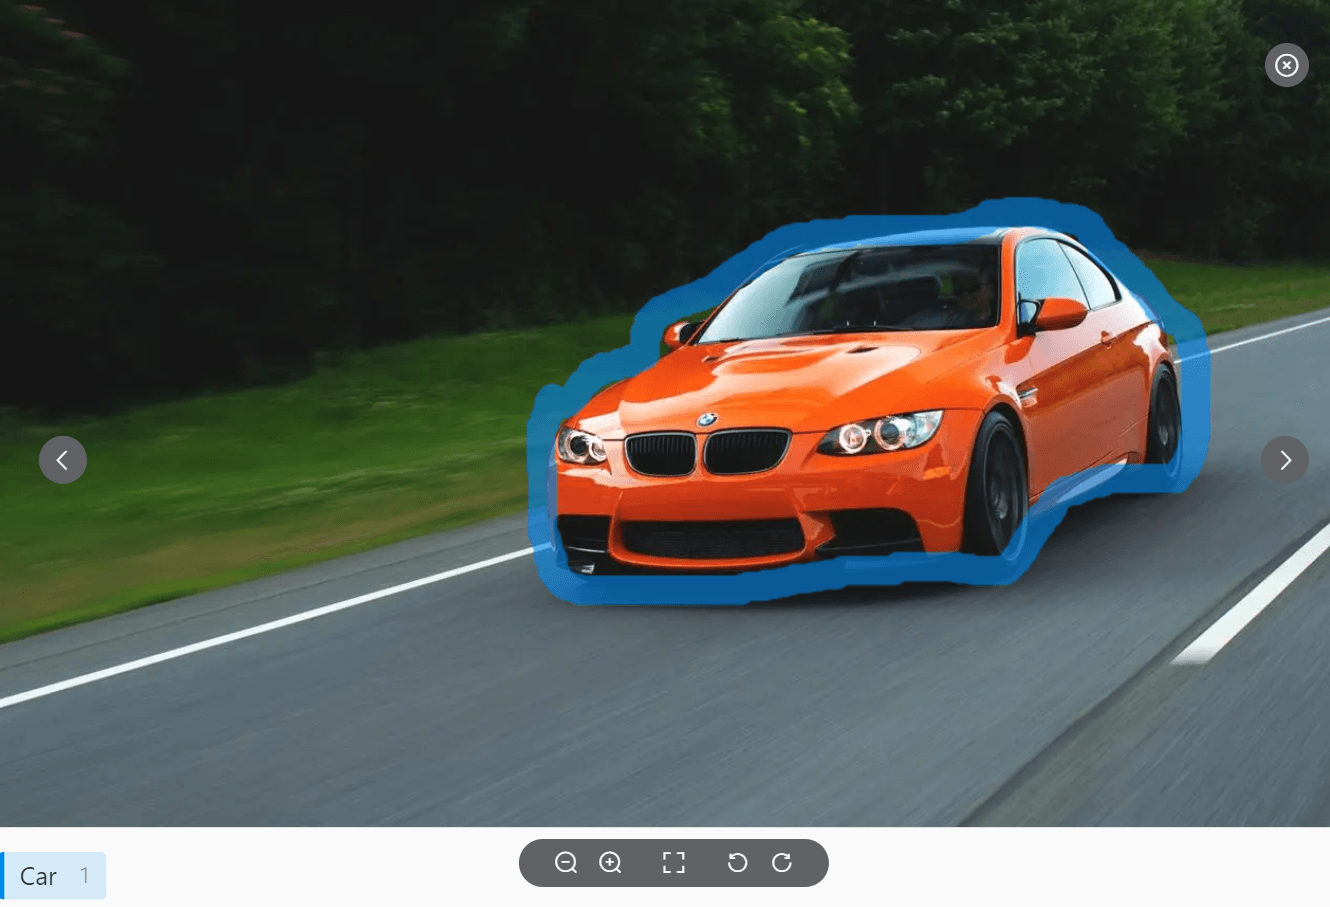
To view annotated images, the image and JSON file must be in the same directory, with one JSON file per image, sharing the same name, and the JSON file must comply with the Label Studio format. For example: a.jpg and a.json. If the annotation JSON file and image are not in the same directory, configure the JSON file path in the dataset_json_setting.json configuration file. This template is located in the global shared directory /defaultShare. Copy the template to the user's home directory and configure the image and JSON file paths according to the template comments.
The viewing effect is shown below:
Play Audio
Supports double-clicking or clicking the View button to play audio files.

Play Video
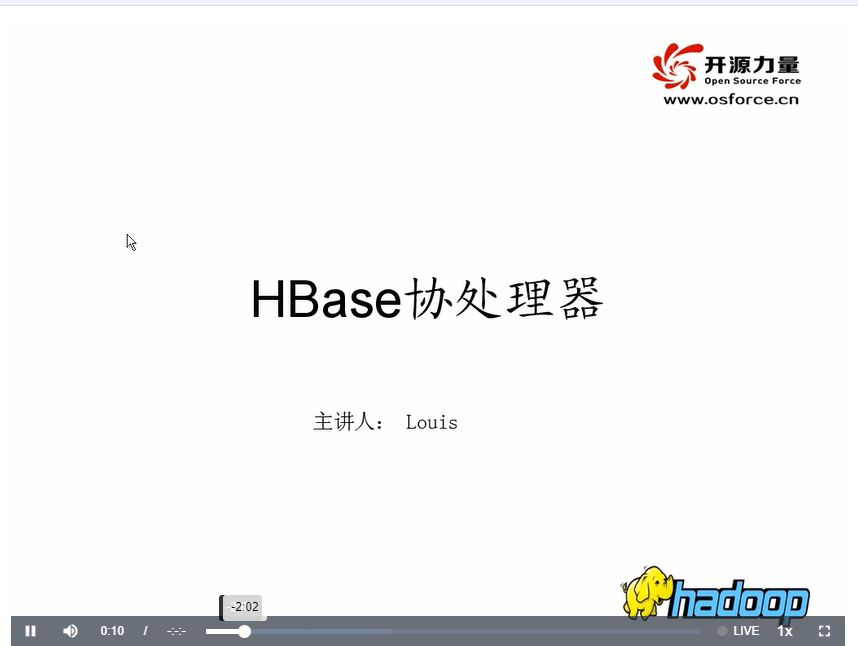
Supports double-clicking or clicking the View button to play video files.
Copy To
Select a file, right-click, and click Copy To from the menu, or click the Copy To shortcut above the path navigation bar. A dialog appears to select the target folder. File processing progress is displayed in the right-side progress list. You can navigate to the file list via directory links in the progress list.

Rename
Select a file, right-click, and click Rename from the menu, or click the Rename shortcut above the path navigation bar. The Rename dialog appears. Enter a valid filename (consistent with new folder constraints) in the Name field, click OK, and the page automatically refreshes to display the renamed file.

Compress
Compression supports batch or single file compression in tar, tar.gz, and zip formats. Select files, right-click, and click Add to Archive, or click More in the shortcut menu above the path navigation bar and select Add to Archive. The Compress dialog appears. Enter a valid archive name in the Name field, click OK, and the page automatically refreshes to display the compressed file. Processing progress is shown in the right-side progress list. You can navigate to the file list via directory links in the progress list. Compression is only available in the user directory.


Decompress
Select an archive, right-click, and click Extract. The archive is extracted to a folder with the same name. The page automatically refreshes to display the extracted files. Processing progress is shown in the right-side progress list. You can navigate to the file list via directory links in the progress list.

Upload Files
- Click the Upload shortcut above the path navigation bar to upload files.


- Click Upload Files. A prompt displays the maximum number of files for a single upload. Click OK to open the file selection dialog and choose files to upload.
- Select files to upload (multiple files supported). Click Open. The file processing list displays upload progress for each file. Upon completion, the page automatically refreshes to show the uploaded files.
- The default maximum size for a single uploaded file is 20GB. If the file exceeds this limit, use the xftp tool for upload.
Upload Folders
- Click the Upload shortcut above the path navigation bar to upload folders.


- Click Upload Folder. A prompt displays the maximum number of files allowed in a single uploaded folder. Click OK to open the folder selection dialog and choose the folder to upload.
- Select the folder to upload (only one folder allowed). Click Open. The file processing list displays the upload progress for the folder. Upon completion, the page automatically refreshes to show the uploaded folder.
- The default maximum total size for a single uploaded folder is 20GB. If the folder exceeds this limit, use the xftp tool for upload.
Download
- Select a file, right-click, and click Download from the menu, or click More in the shortcut menu above the path navigation bar and select Download. Only single file downloads are supported. Downloads are only available in the user directory.
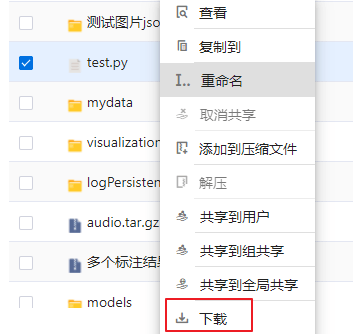
- A download confirmation prompt appears.
Delete
- Supports single-file and batch deletion. Select the file or folder to delete, right-click, and select "Delete" from the context menu, or click "Delete" in the quick menu above the path navigation bar.
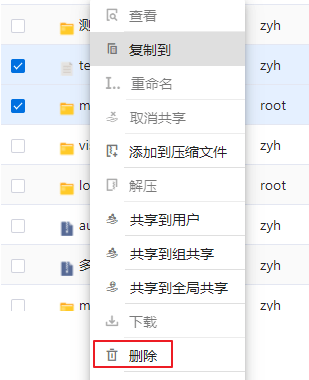
- A confirmation dialog appears. Click "OK" to delete the file. The file processing list displays the deletion progress. Upon completion, the page automatically refreshes.
Sharing
- Sharing files in the user directory defaults to sharing to group or global shares. Select a file, right-click, and choose "Share to Group Share" or "Share to Global Share" from the menu, or click "More" in the quick menu above the path navigation bar to select the operation.

- If only one global or group share directory exists, the file is shared directly to that directory without requiring a target folder selection. If multiple global or group share directories exist, a dialog box appears to select the target folder. The file processing progress is displayed in the right-side progress list. You can navigate to the file list via the directory link in the progress list.
- Users with file sharing enabled can share files with specific users. Enter the username in the pop-up dialog to share the file with that user.


Unshare Model
- Supports single and batch unsharing. In the global or group share directory, select the file or folder to unshare. Only files shared by the current user can be unshared; files shared by others cannot. Right-click and select "Unshare" from the context menu, or click "More" in the quick menu above the path navigation bar to select the operation.

- A confirmation dialog appears. Click "OK" to unshare the file. The file processing list displays the unsharing progress. Upon completion, the page automatically refreshes.
File Search
- Enter the search keyword in the search box and press Enter or click the search button to perform a global search within the current directory.

- If there are many search results, use the right-side scrollbar to scroll through them.
Path Search
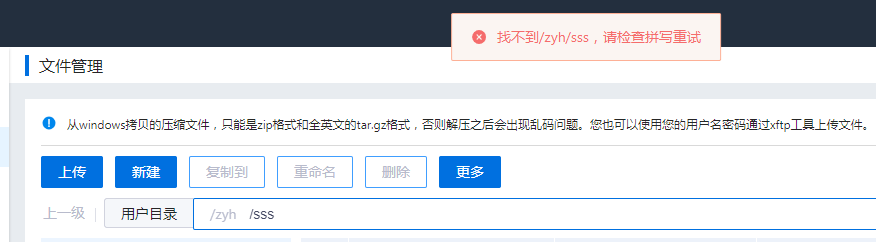
- Click the blank area in the path navigation bar to switch to edit mode, allowing custom path input. Click the go icon or press Enter to navigate to the specified path. If the path does not exist, the page displays "Cannot find xxx, please check spelling and retry."

- Click the dropdown arrow on the right side of the path navigation bar to view recent path search history, displayed in reverse chronological order. A maximum of 15 entries are shown per directory type (User Directory, Global Share, Group Share, Sample Data) for each user.

Progress Operations
- Operations included in the file processing list are: copy, share, delete, unshare, compress, decompress, and upload. Only one operation per user can be processed at a time; others must queue.
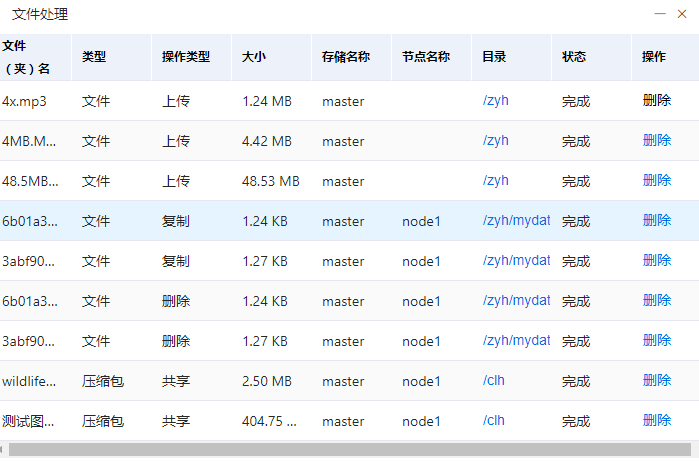
- The file processing progress list supports viewing, deleting, minimizing, and closing. When minimized, the list appears as a floating window, allowing normal module switching (e.g., development environment, training jobs). You can delete progress entries for processing (shown as percentage), queued, failed, or completed tasks. When closing the file processing progress list, all completed tasks are cleared. If file processing tasks remain, the list remains as a floating window.
User Directory Ownership
Only regular users can perform user directory ownership operations, limited to files and folders within their own user directory.
Select one or more files or folders in the user directory, click "More" in the quick menu above the path navigation bar, and select "Ownership". A confirmation dialog appears. Click "OK" to assign ownership of the selected files to the current user.
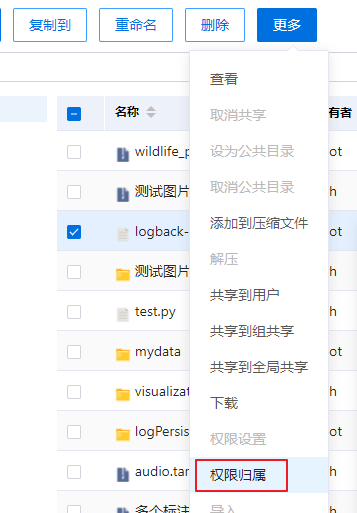
After completing the above operations, the owner in the file list is displayed as the current user.
User Directory Import
After adding external storage, for existing platform users, if the user's home directory does not exist on that storage, clicking the backup storage name prompts: "User home directory does not exist. Do you want to import?"
Click "OK" to automatically import the user's directory from all backup storages.
Click "Cancel" to skip automatic import. Users can manually create the home directory on the new external storage via the User Directory Import feature.

Upon successful import, the page automatically refreshes and navigates to the user's home directory.
Object Storage Configuration
This feature is available only when configuring Ceph object storage. Click the "Object Storage Configuration" button and fill in the configuration details. Each user can configure only one instance; multiple configurations are allowed, with the latest taking precedence. No validation is performed on configuration items. Correct configurations display the file list; incorrect configurations prompt with configuration error messages.

The object storage configuration fields are as follows:
| Field Name | Field Description | Field Entry Notes |
|---|---|---|
| Storage Name | Object storage name | This value cannot be modified via the UI; no entry required. |
| accessKey | User Access Key (AK) | Required field |
| secretKey | Used by the user to encrypt the signature string or Secret Key (SK) | Required field |
| endPoint | Access domain, which can be an IP:Port or a custom domain | Required field |
Dataset Management
Available under "Data Management > Dataset Management" when the business scope is Training + Inference or Training.
Applicable Storage
Dataset management is only applicable to shared file storage (NFS, GPFS, etc.). Object storage (Ceph, HDFS, etc.) does not support the dataset management feature.
Create Dataset
Click the "Create Dataset" button in the upper right corner of the list to create a dataset. Required fields are Name, Import Data Path, and Data Type. The dataset name is automatically generated by the system as "dataset-" followed by four random characters, but can be customized. For the Import Data Path, select sample data from File Management. Data types include Image, Text, Audio, Video, and Other. The description is optional; if provided, it must not exceed 256 characters. Upon creation, a V001 version is automatically created from the selected import path. The import path can be the user directory, global shared, group shared, or sample data directory. Each user can create a maximum of 100 datasets.
| Field Name | Field Description | Field Entry Notes |
|---|---|---|
| Name | Dataset Name | Required. Automatically generated, editable, and must be unique. |
| Import Data Path | The folder directory for the dataset. Options include Home Directory, Group Shared, Global Shared, and Sample Data. | Required field |
| Data Type | Supported data types: Image, Audio, Text, Video, Other. | Required field |
| Description | Dataset Description | Optional |

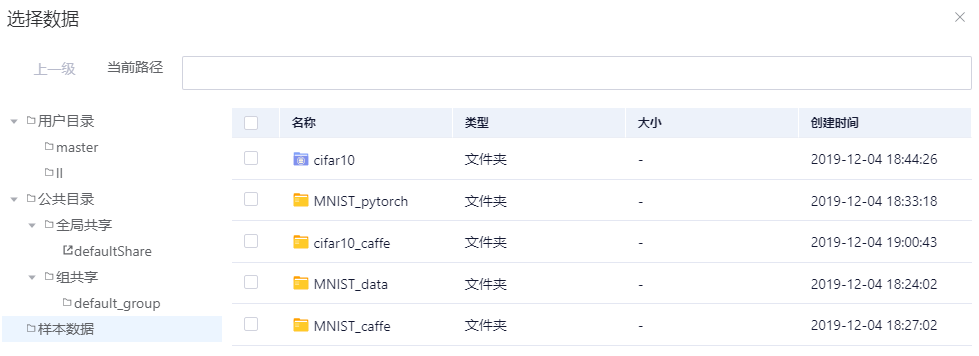
The directory selected for the Import Data Path displays a shared icon in "File Management," distinguishing it from standard folder icons.

View Dataset List
Displays only datasets created by the user and versions shared with the user. List contents include: Name, Data Type, Import Data Path, Storage Name, Status, Creation Time, Description, Creator, and Actions (Create Version, Delete). Supports fuzzy search by dataset name.
Note: The "Invalid" status occurs when the import data path does not exist. Invalid datasets cannot be cached, nor can versions be created or data modified.
Create Version
Supports modifying data processing methods. Click "Create Version" to create a new version under the dataset. The source can be the original dataset or a published dataset version. After creation, files can be added, deleted, or modified for each version, which can then be published. Published versions cannot be modified. To modify files again, a new version must be created. The dataset name is automatically carried over and cannot be modified. The source can be the import data path or a published version. Versions are automatically generated sequentially from V001 to V999. Version names can be customized but must be unique. Version names can only contain alphanumeric characters, underscores, and hyphens, cannot start with an underscore or hyphen, and must not exceed 32 characters. Created versions automatically appear in the progress list, displaying Version, Dataset, Node Name, Operation Type, Storage Name, Status, and Actions.
| Field Name | Field Description | Field Entry Notes |
|---|---|---|
| Name | Dataset Name | This value cannot be modified via the UI; no entry required. |
| Source | Original import data path or a published version under the dataset. | Required field |
| Version | Version Name under Dataset | Required. Automatically generated, editable, and must be unique. |
| Description | Version Description | Optional |

Modify Data (Add, Delete, Edit Files)
Unpublished versions can be modified. Operations include: Import, Delete, Edit File.
- Import data can be selected from files in File Management, but cannot import the original data selected when creating the dataset. If importing a file with a duplicate name, a prompt asks whether to overwrite. Click the version name to enter the file list page, click the "Import" button in the upper right, select the data to import in the File Management page, and click OK. Imported data automatically enters the transfer list. The progress list displays the imported file (folder) name, node name, type, operation type, size, storage name, status, and actions.


- To delete data, select the files to delete from the file list and click the "Delete" button in the upper right. Deleted data automatically enters the transfer list.


- To edit a file, click the file name to open the editable file, enter the modifications, and click OK.
Publish Version
For unpublished versions, click the "Publish" button in the actions column to publish. Alternatively, click the "Publish" button on the file list page of that version. Versions can be published to Personal, Group, or Global scope. Personal scope is accessible only by the individual; Group scope is accessible by users within the group; Global scope is accessible by all users.



After clicking "Publish" and selecting the publication method, if a message appears stating "This operation requires administrator approval; results can be viewed in Approval Management," administrator approval is required. If approved, the version is published; if rejected, the publication process is halted.

Version View
Published dataset versions can be viewed to trace their source and history.

Delete Version
Regular users can delete dataset versions in Published, Unpublished, or Invalid states, but cannot delete versions created by others and shared with them. Deleting a published dataset version is a logical deletion; underlying and database information is retained, but the version is marked as deleted. This allows other modules (such as development environments, training jobs, etc.) to trace the files used when referencing this dataset version. Click the action button in the actions column to perform the deletion.

Delete Dataset
Click the "Delete" button in the dataset actions column to delete the dataset. This operation permanently deletes all versions under the dataset and cannot be undone.

File List Display
Click the version name to display the list of all files under that version.

File View
Supports viewing regular files, images (png, jpeg, jpg, bmp), audio files (mp3, wav, flac), and video files (mp4, avi, flv, mov). Supports viewing regular files and images under 50MB, audio files under 50MB by default, and video files under 100MB by default.
Publish Dataset for Use
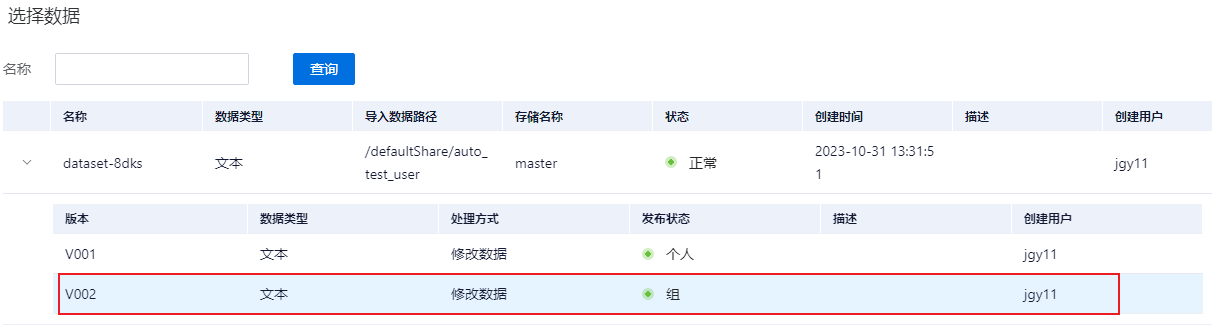
Publishing datasets (with statuses: Personal, Group, and Global) supports only node caching and does not support updates. Using the development environment as an example: When selecting data, choose Dataset Management to display the list of all datasets. Expand the list to show all published versions; only one version can be selected. Click OK.

Transfer List Operations
- Operations in the transfer list include: Create Version, Import, and Delete. Only one operation per user can be processed at a time; others must queue.
- The transfer list supports operations such as View, Delete, and Close.
Data Processing
Click the "Data Processing" button in the upper right corner of the list to create a data processing job. The following information is required:
| Name | Description |
|---|---|
| Job Name | The name of the job. Required. Accepts only English letters, numbers, and underscores. Cannot start with an underscore. |
| Container Image | Container image for running the job. Required. |
| Run | Run mode. Required. Choose either Script Mode or Command Mode. In Script Mode, only Python scripts can be selected. |
| Resource Group | Resource group required for running the job. Required. |
| Cluster Network Type | Cluster network type required for running the job. Required. |
| Data | Data selected for the data processing job. Optional. Selected data can only be used via mounting. |
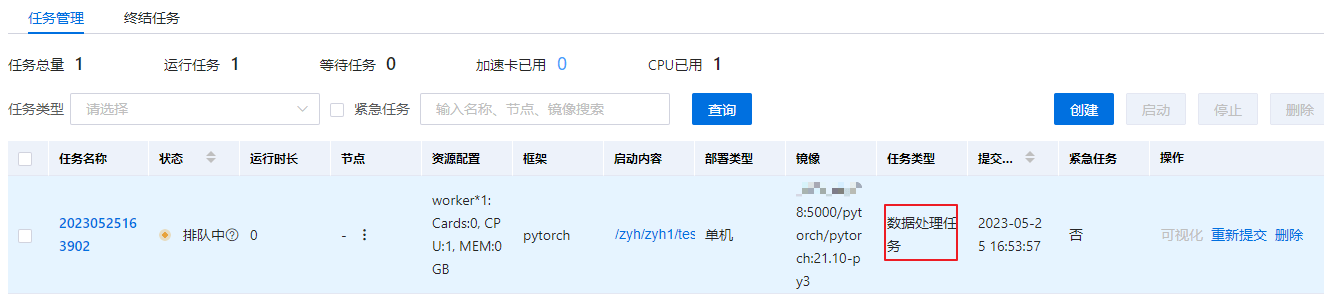
After submission, the system redirects to Job Management, where the list displays jobs of the type Data Processing Job.