Quick Start Operation Guide
The Quick Start Operation Guide helps users quickly begin basic AI algorithm development and training tasks.
Copy Data
The platform provides four directories for data storage: personal home directory, sample data directory, global shared directory under the public directory, and group shared directory. Regular users can upload data via the page or using SFTP tools. The following describes the operation of uploading data via SFTP;
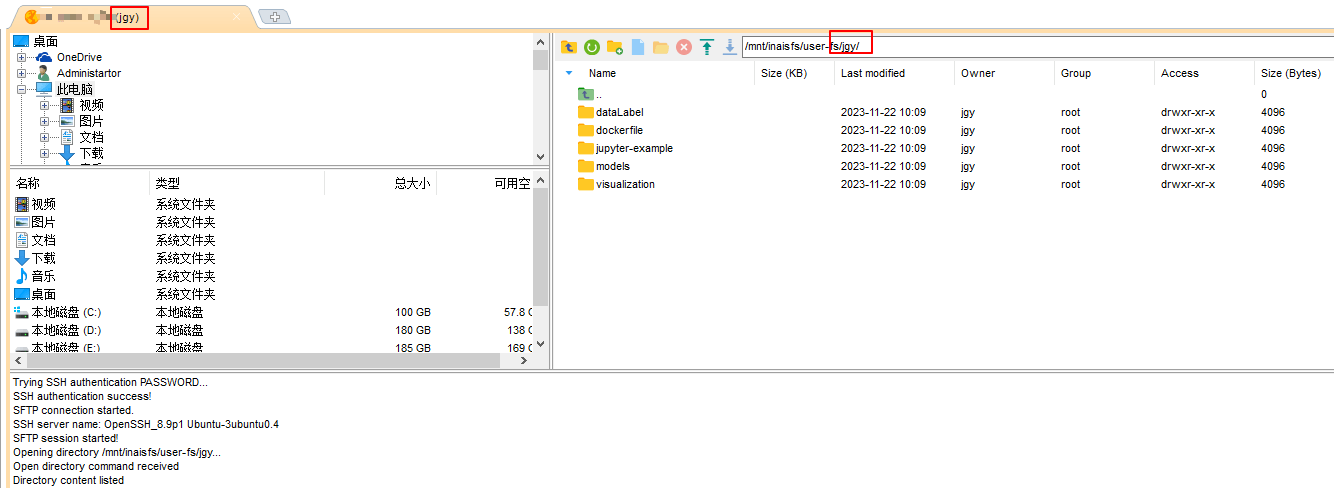
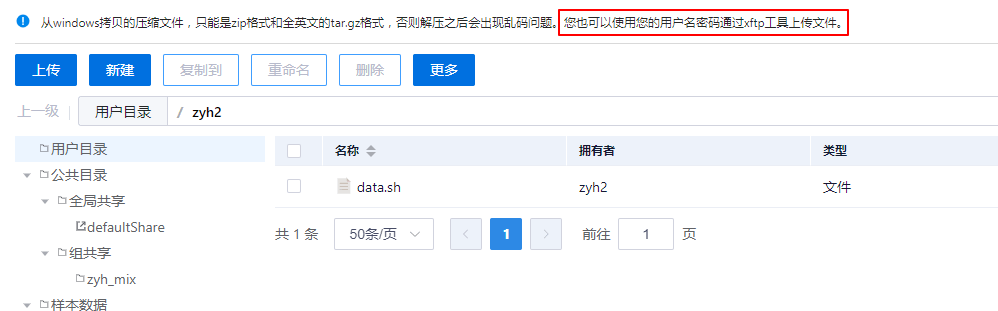 Open the XFTP tool on the PC. Log in to the platform using the IP, port, username, and password. After a successful connection, you can perform data file upload operations.
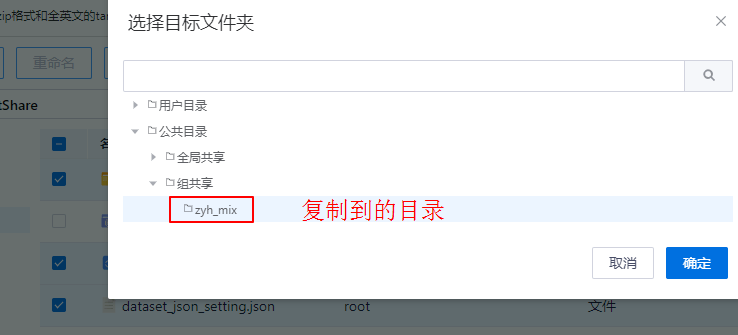
Copy Data Within the Platform
After installation, the platform includes basic models and test scripts. These data files are located in the user-data directory under File Management - Global Shared - defaultShare. Users can copy all files and directories from this directory to their home directory using the 'Copy To' function. The operation instructions for a regular user are as follows:
Model Development and Debugging
The following uses the tmpUser as an example, using the default resource group with the general label (select based on actual conditions). We use creating a TensorFlow framework development environment as an example. After entering the shell terminal, the directory is the current user's home directory. The platform's built-in examples are stored in the /defaultShare/user-data directory and can be copied to the user directory using the copy function in File Management. Since all job scripts use tmpUser as the default user path; if it is another user, first run ./user_path_change.sh user_name to modify the path information in the job scripts. The steps to create a TensorFlow development environment are as follows:
Image: The TensorFlow image is under the TensorFlow tab.
Dataset Path: MNIST_data.
The steps to create a development environment are as follows:
- Click the 'Create' button in the upper right corner.
- When creating a development environment, the name is automatically generated based on the current date and time. Users can also modify the development environment name.
- Development environment parameter descriptions:
3.1 Select the corresponding TensorFlow framework image.
3.2 Users can select the resource group where the development environment will be created.
3.3 The right side displays the current user's group membership, available personal resources, and remaining resources on each node in the selected resource group. If a specific node is selected, the development environment will be created on that node; otherwise, the system's internal scheduling mechanism will select the node.
3.4 Accelerator Series: Select the corresponding accelerator series from the dropdown list; the available node information on the right dynamically filters based on the selected series.
3.5 Accelerator Type: Lists the GPU types included in the selected resource group. After selecting a GPU type, the development environment is scheduled to a physical machine with the corresponding GPU.
3.6 CPU/Accelerator: Recommended resource configurations, including common CPU and accelerator quantity settings.
3.7 Users can configure the number of GPUs and CPU cores for the development environment.
3.8 Data Configuration: Select File Management to choose datasets in the path selection window (multiple datasets supported); or select Dataset Management to choose from the dataset list. Click Select Data to mount dataset paths. During development environment creation, selected paths are mounted. Use the dataset update toggle to determine whether to update local cached datasets.
3.9 Model Selection: Users can select models to mount.
3.10 Environment Variables: Users can add custom environment variables.
3.11 More Options: Click “More Options” to access additional development environment settings:
Memory: Default is 0 (unlimited); users can set a custom value.
Port: Users can specify required ports. Left side is the container internal port; right side is the external port (optional).
shm_size: Shared memory size, default 4GB.
Replicas: Create multiple development environments simultaneously.
Startup Command: Allows users to launch the development environment with custom commands; users must ensure command correctness.
During development environment creation, datasets sync and download with progress displayed. After creation, click the environment name to enter the development environment page.
After creation, enter the WebShell terminal and switch to the tensorflow/mnist directory:
cd /tmpUser/models/tensorflow/mnist
Startup Command:
python tf_mnist_single.py
Alternatively, connect to the development environment via the shell terminal by clicking the “SSH” button in the development environment list to view connection details.
Open a shell terminal on your PC to connect to the development environment and execute training job commands.
Execute the tf_mnist_single.py file for single-machine, single-accelerator training jobs.
Training Jobs - Managed Service
The following describes creating a TensorFlow single-machine job using the tmpUser account:
- Click the “Create” button to start creating the TensorFlow single-machine job.
- Fill in job information
-- Image: Select the TensorFlow container image
-- Dataset: /MNIST_data
-- Startup File: TensorFlow single-machine training script, /tmpUser/models/tensorflow/mnist/tf_mnist_single.py

Or use command mode:
python /tmpUser/models/tensorflow/mnist/tf_mnist_single.py

Select other parameters as needed.
Training Job Visualization
Users can view training logs using the platform's visualization features. Steps:
- Go to “Business Management > Job Management” and click the “Visualization” button
- If no log path was selected during job creation, you will be prompted to select one here
- Click “OK” to open the visualization window