Workflow Business Usage Guide
Use the workflow platform to quickly launch training by defining multiple subtasks in workflow resources. After training, data is stored in the platform, forming a complete business flow. The platform supports scheduled execution, with status, detailed information, and runtime displayed for each step, enabling rapid business iteration.
Create Workflow Basic Information
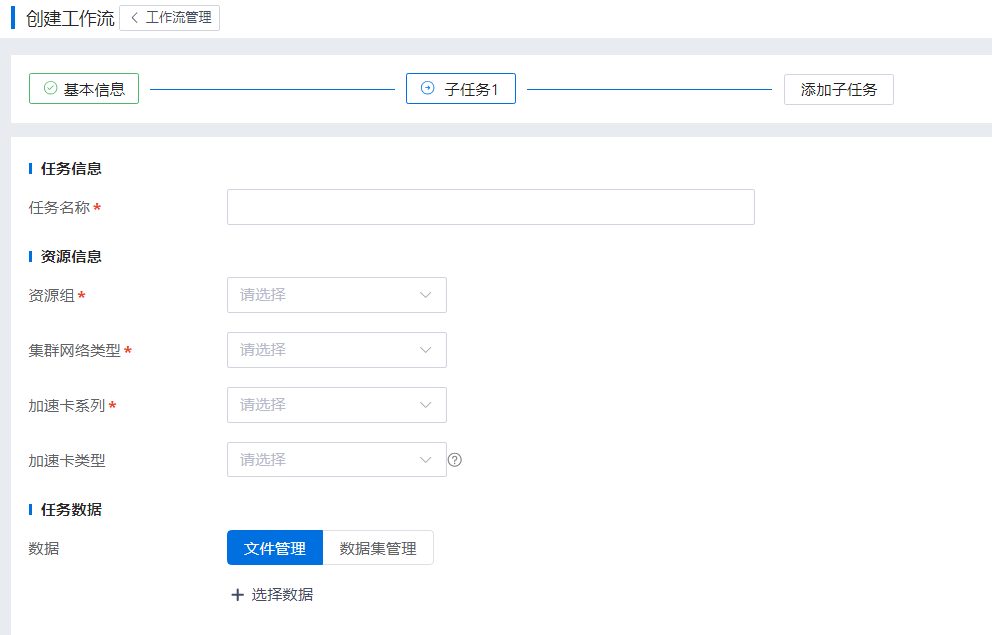
Users click "Create" to enter the workflow creation page. Users can fill in workflow information as needed. The main steps for creating a workflow are:
- Basic information
- Subtasks (supports multiple subtasks)
Basic Information: Users fill in name, scheduled execution, immediate run, and description.

Subtasks: Users fill in task information (task name), resource information (resource group, cluster network type, accelerator series, accelerator type), task data (data), and algorithm information (algorithm details).
Workflow Launch
Workflow startup methods:
- Run immediately: If set to run immediately during workflow creation and editing, the workflow will automatically run immediately after the workflow configuration is completed.

- Non-immediate execution: After the workflow is created, manually click "Run" in the workflow list action bar to start execution.
- Scheduled execution: Configure during workflow creation or editing, or enable scheduled execution from the top of the workflow list.
- Stop execution: For running workflows, manually click "Stop" in the workflow list action bar to halt execution.