Connecting PyCharm to the Development Environment
PyCharm version used in the following example: PyCharm 2018.3 (Professional Edition)
The AIStation development environment SSH service is running normally. The connection information below is for format reference only; please replace it with the actual IP, port, and temporary password displayed by the platform, for example: IP 10.x.x.x, port <SSH_PORT>, password <TEMP_PASSWORD>.
1. PyCharm Configuration
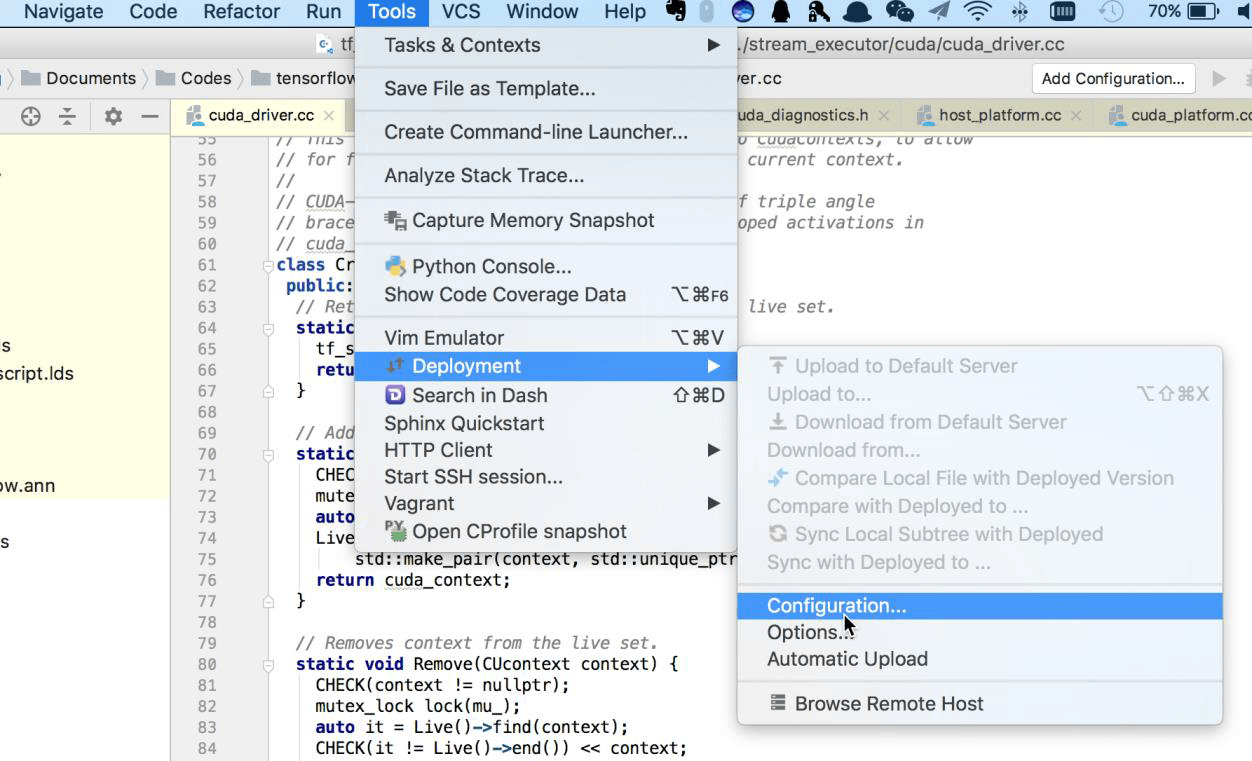
Open PyCharm, select Tools -> Deployment -> Configuration…
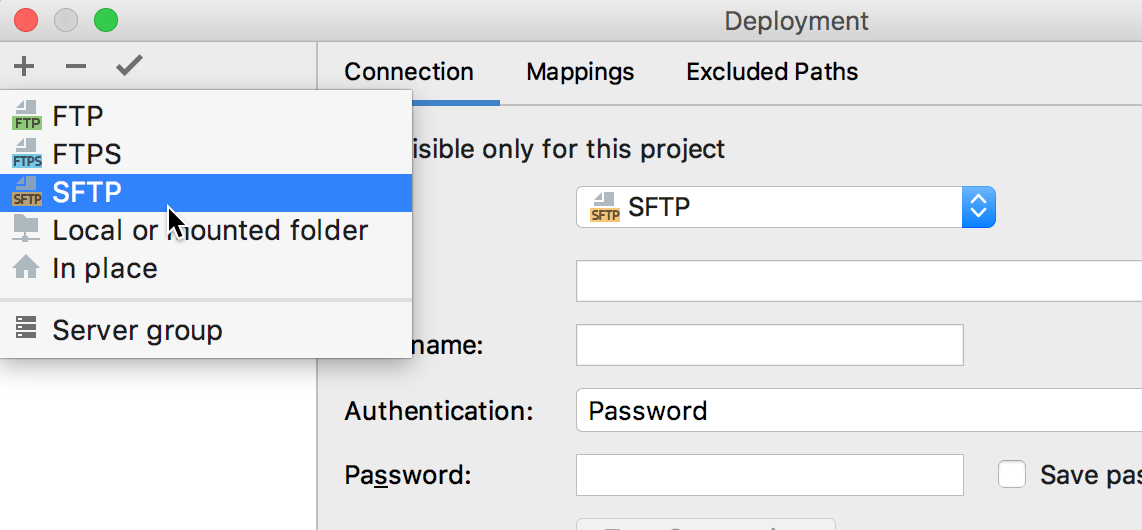
 Click the plus sign in the top-left corner and select SFTP
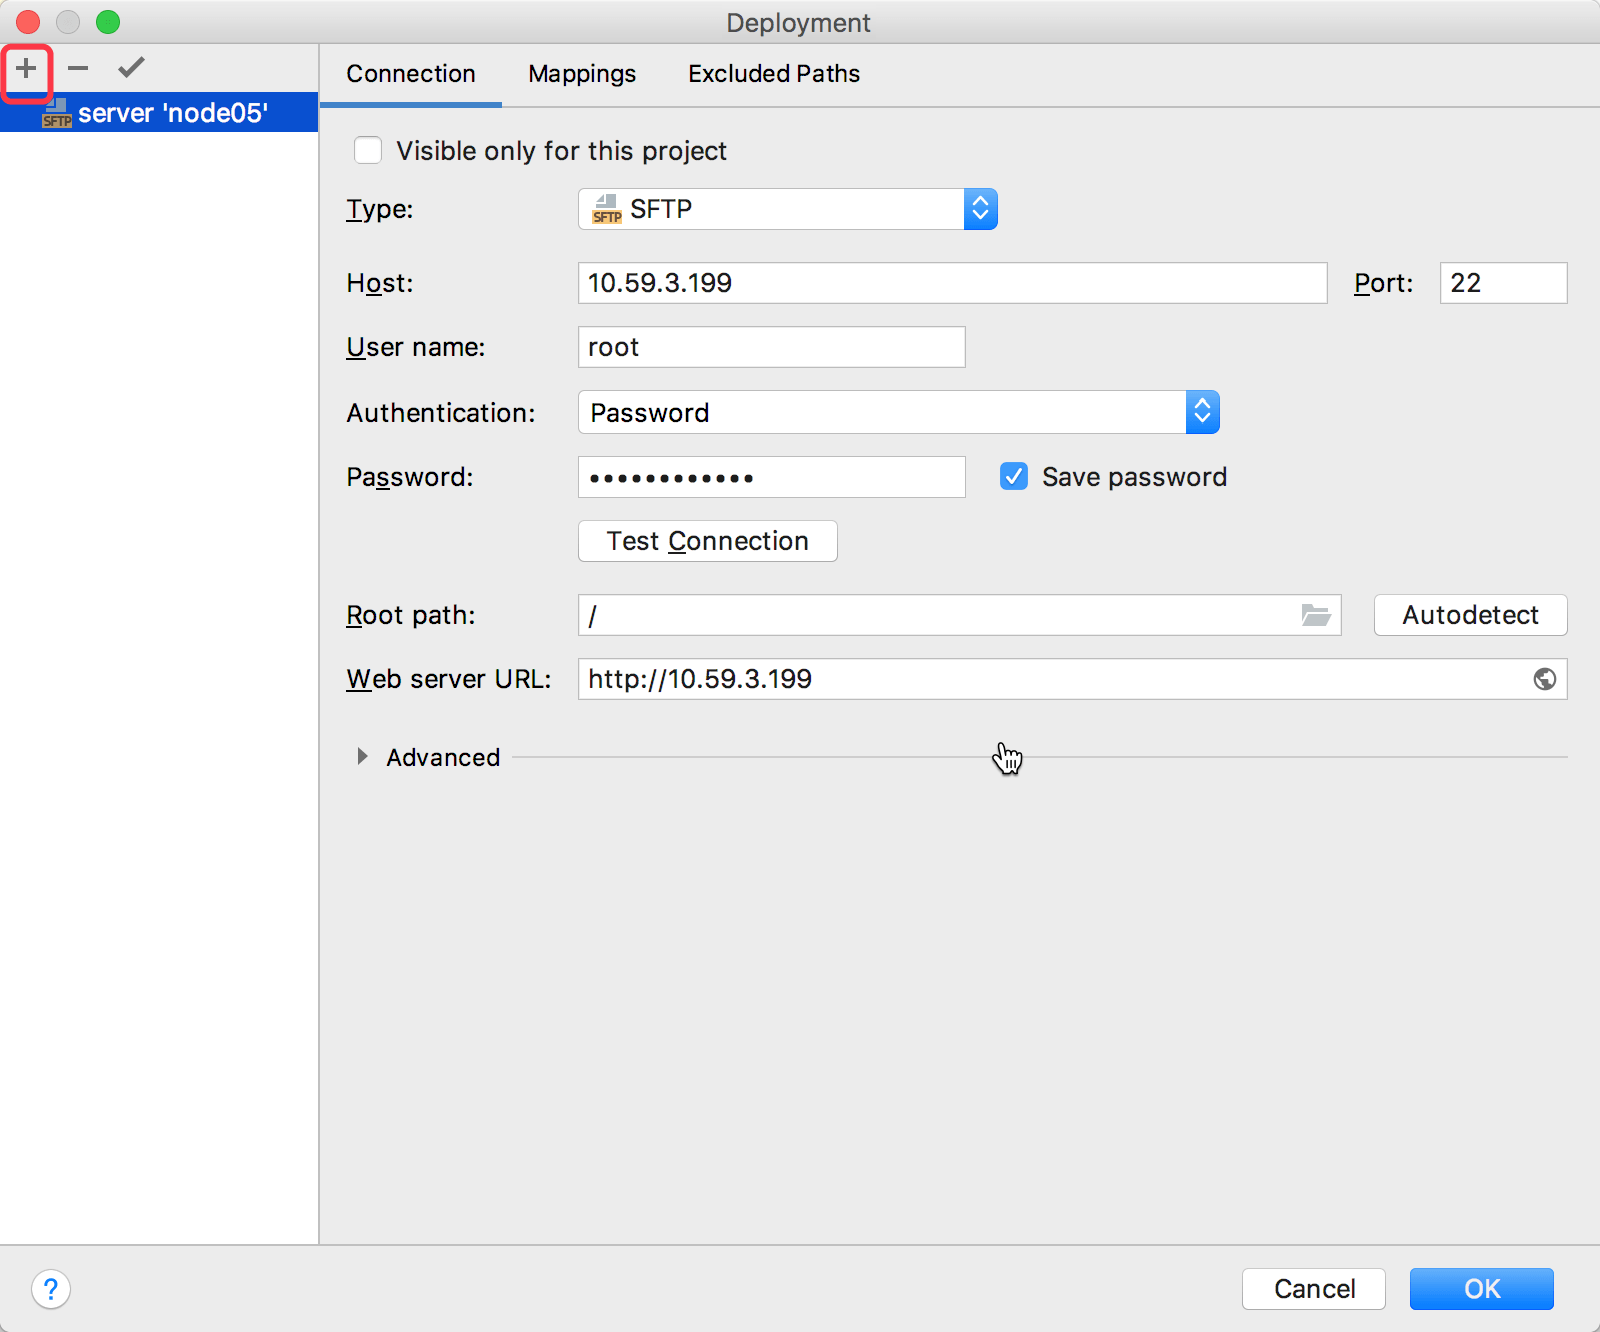
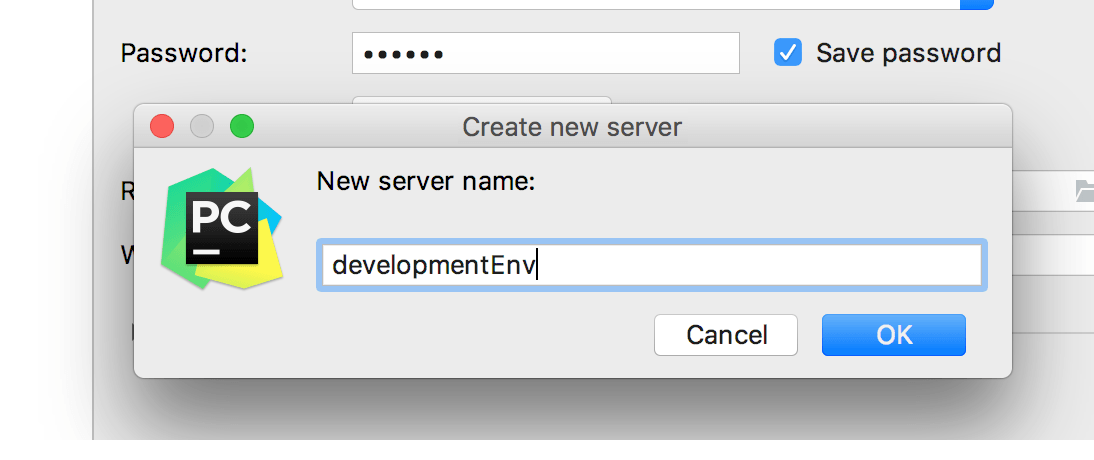
 Enter the configuration name:
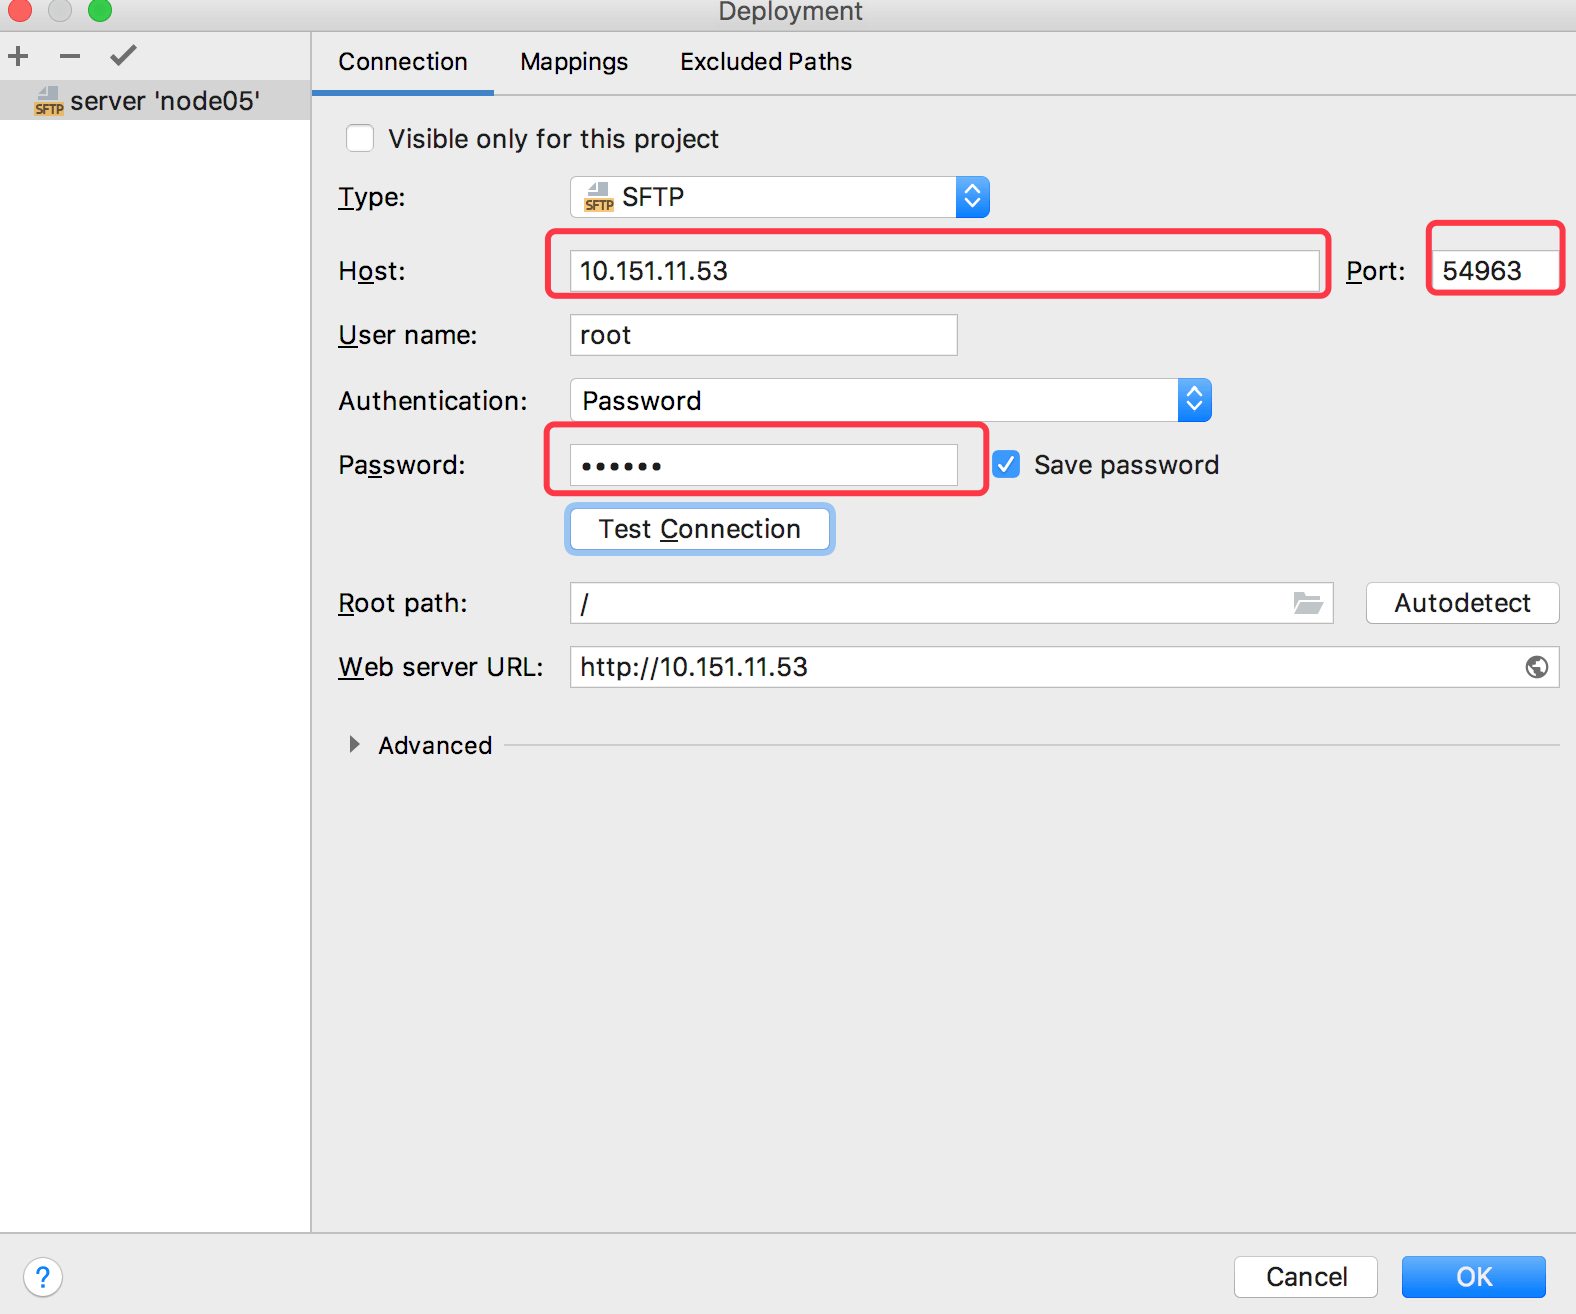
 In the Connection panel on the right, set Type to SFTP. Enter the IP and port obtained in Step 2 for Host and Port, respectively. Enter the password obtained in Step 2 in the Password field.
 Click the "Test Connection" button to test the connection. A success message will be displayed.
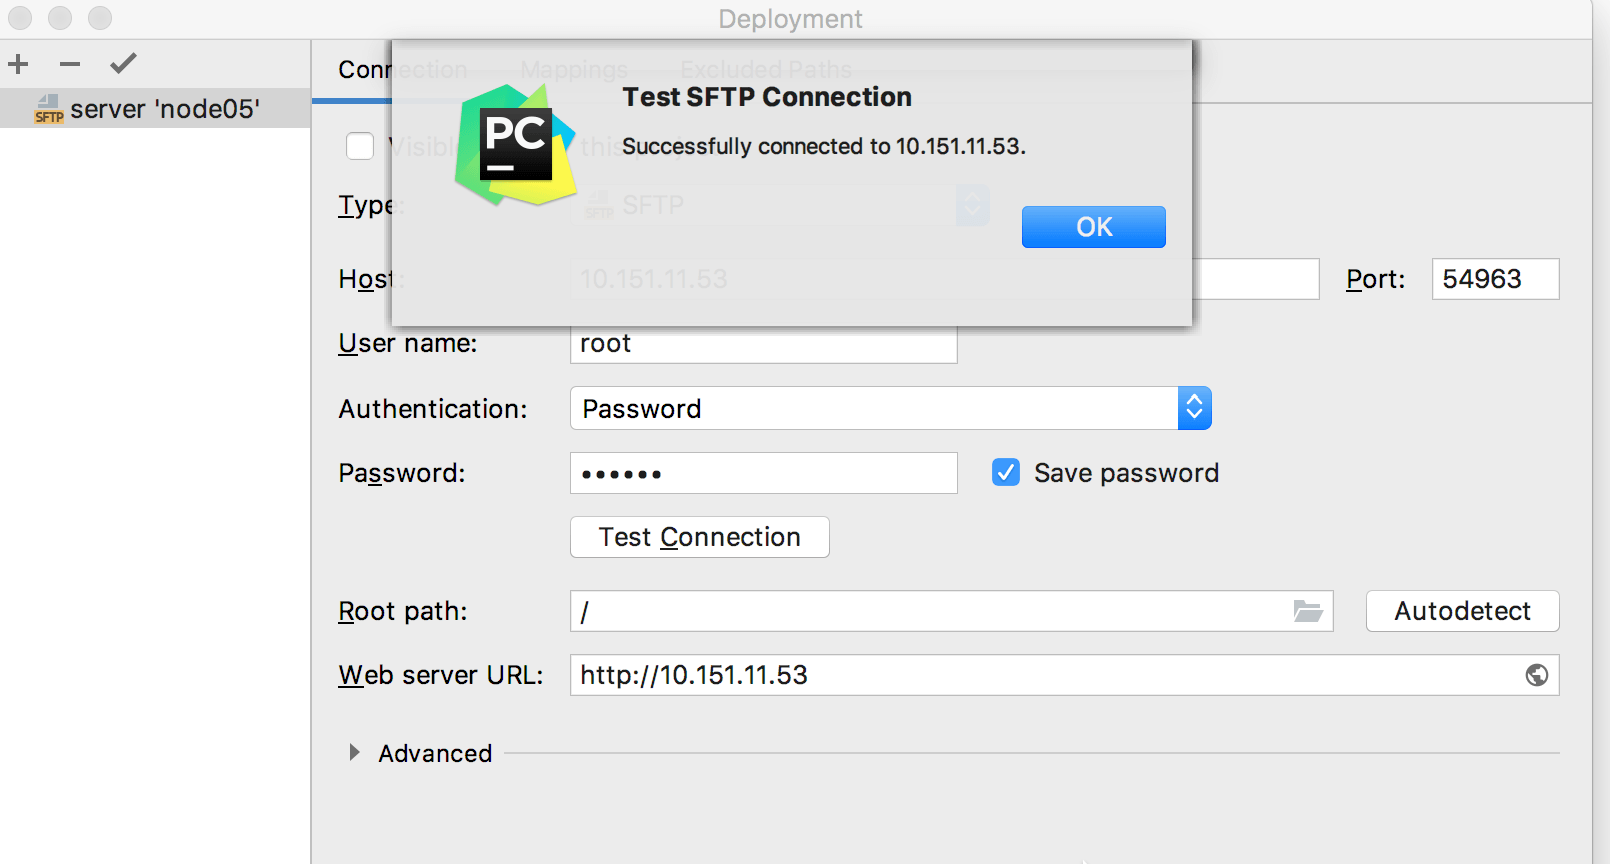 The connection configuration is now complete.
2. Connect to the Development Environment via SSH
Open PyCharm, select View -> Tool Windows -> Terminal.
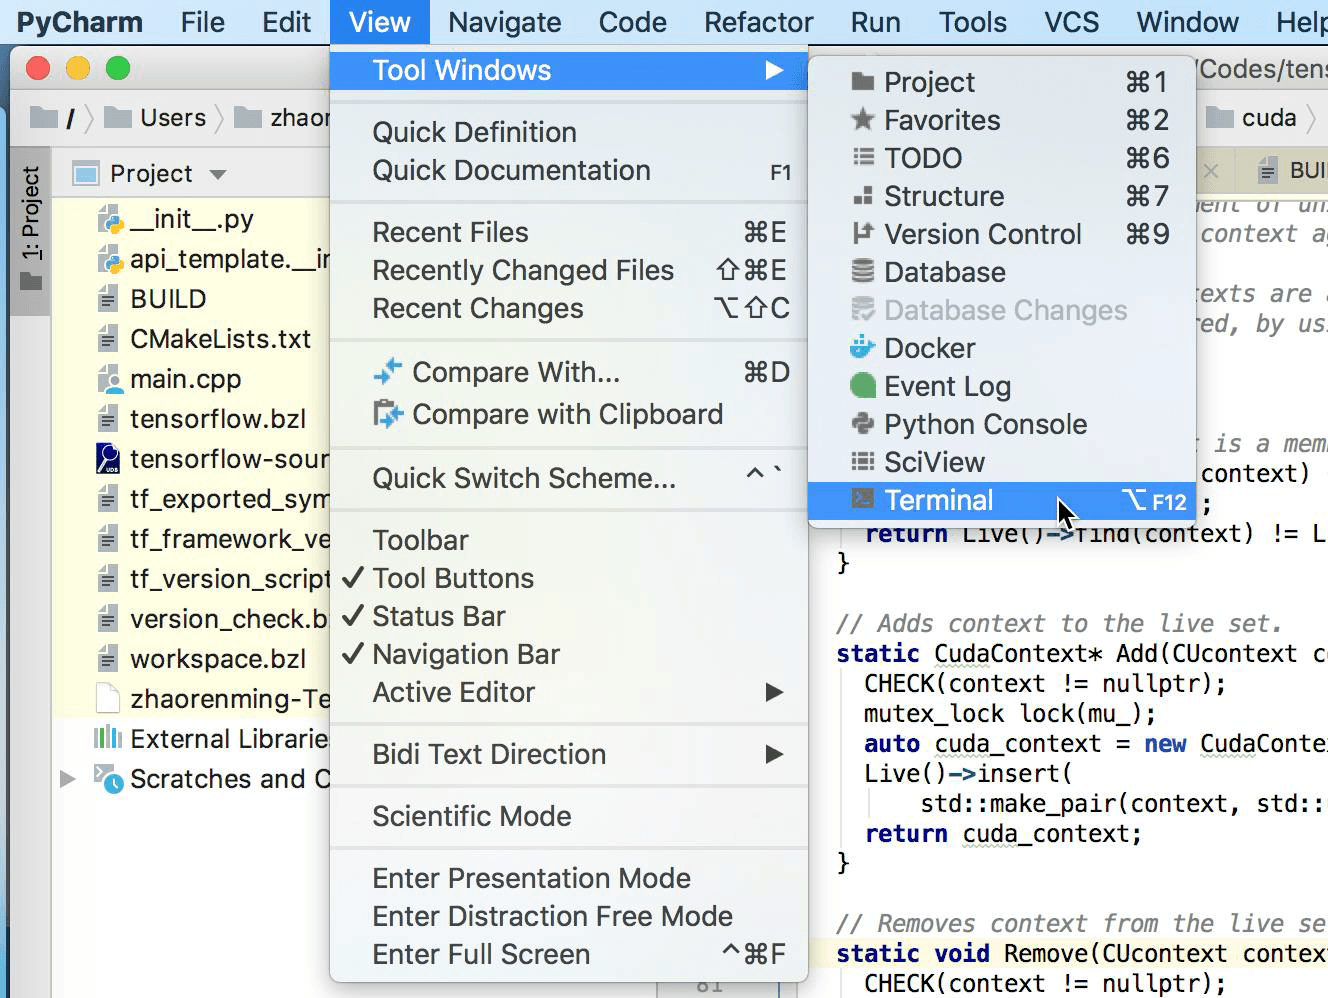 A command-line window will appear in PyCharm.
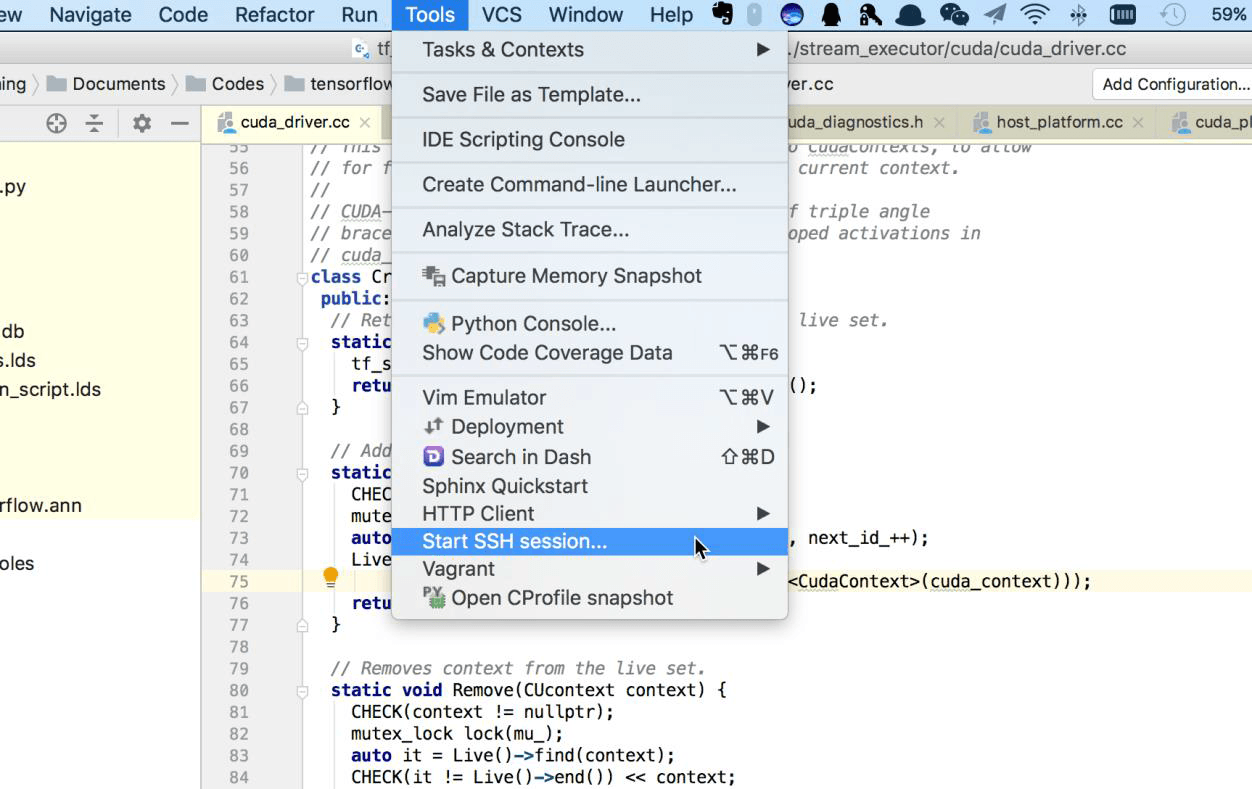
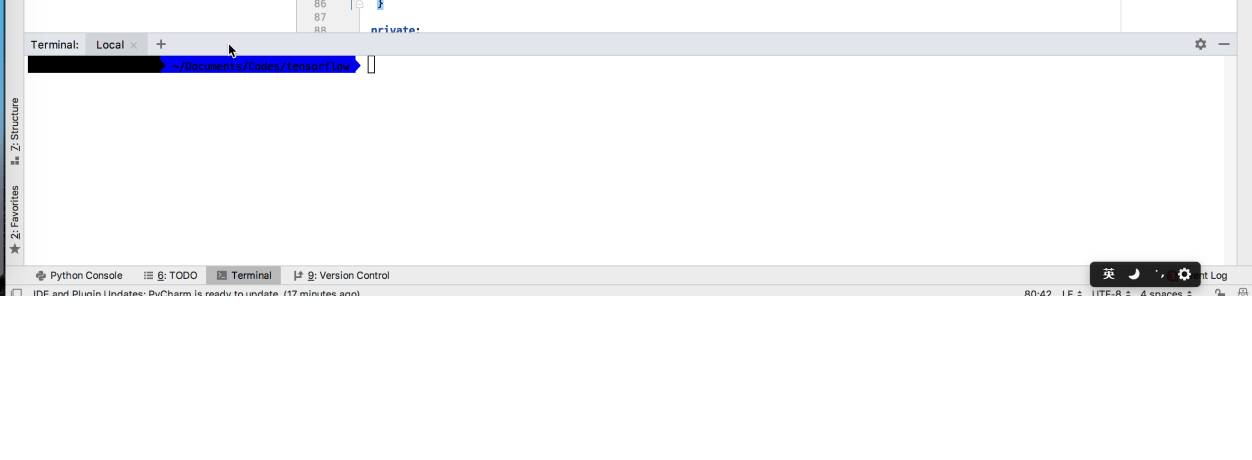 Select Tools -> Start SSH session…
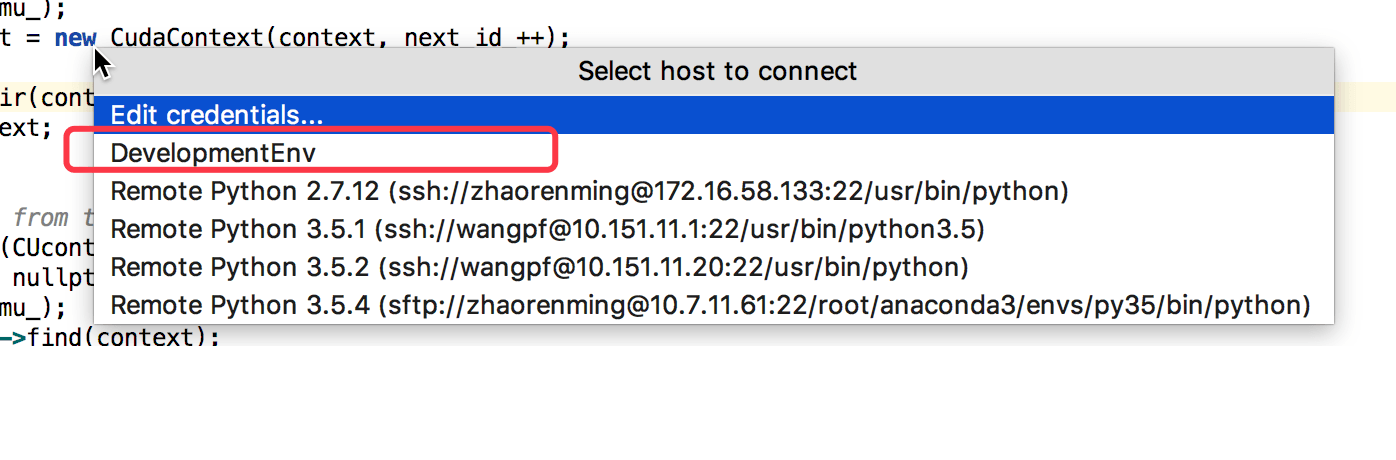
 In the pop-up window, select the configuration created earlier:
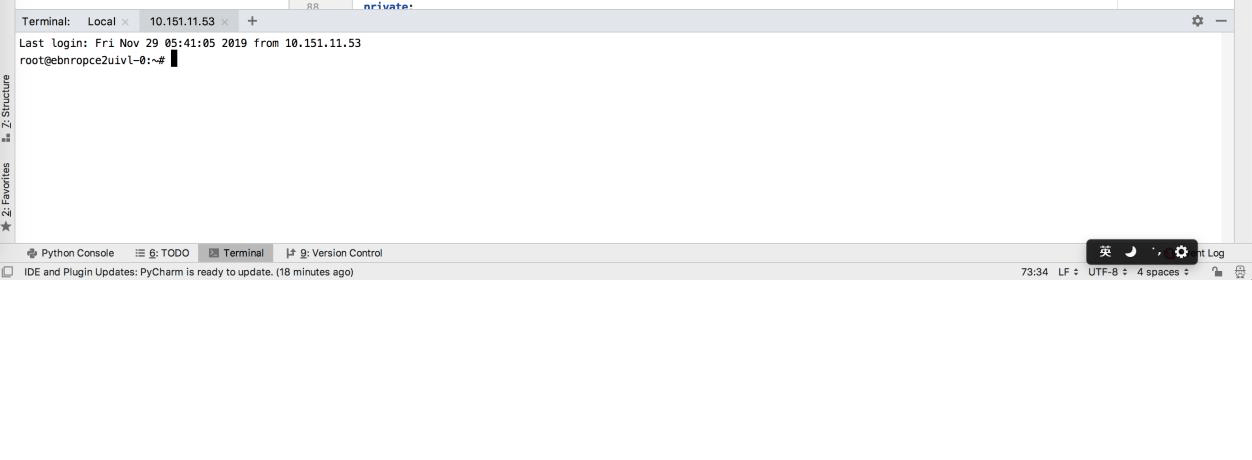
 Check the command-line window; you have successfully connected to the container hosting the AIStation development environment.
3. Configure Remote Debug
Open PyCharm, select Tools -> Deployment -> Configuration…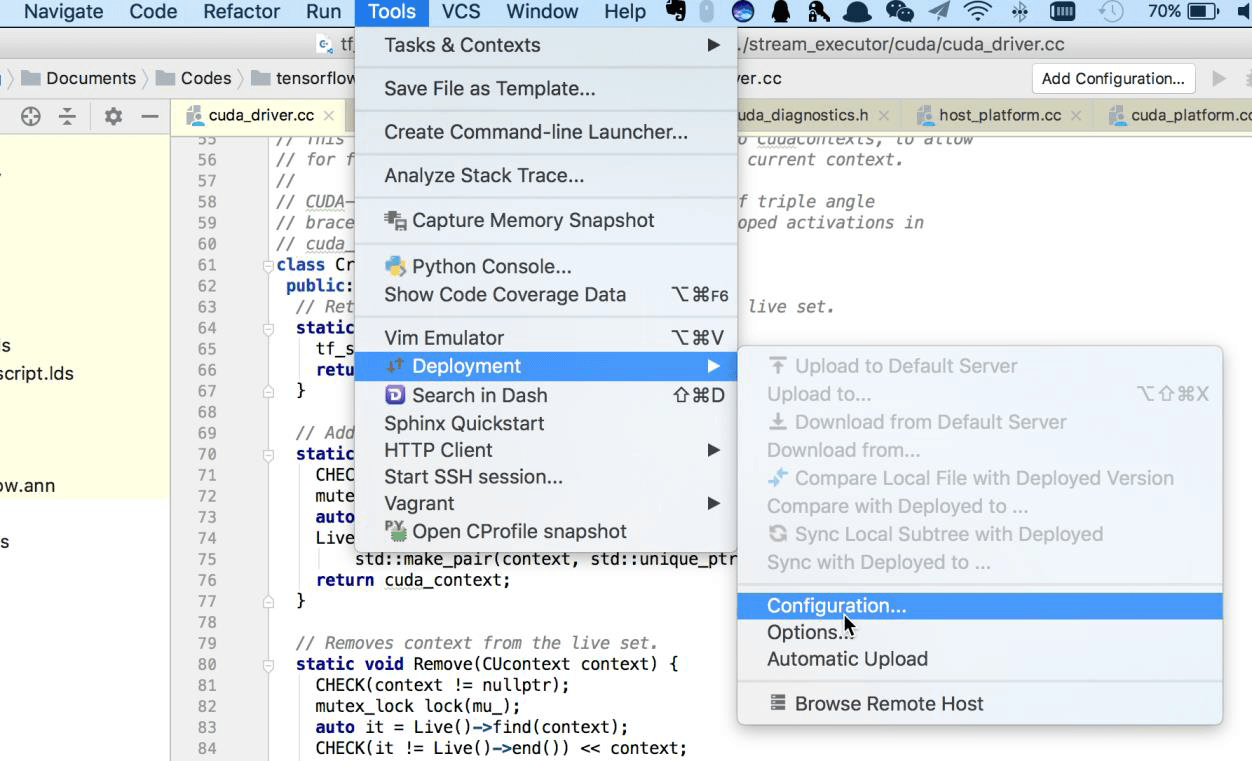 Select the Server configured earlier as 'DevelopmentEnv'. Click Mappings.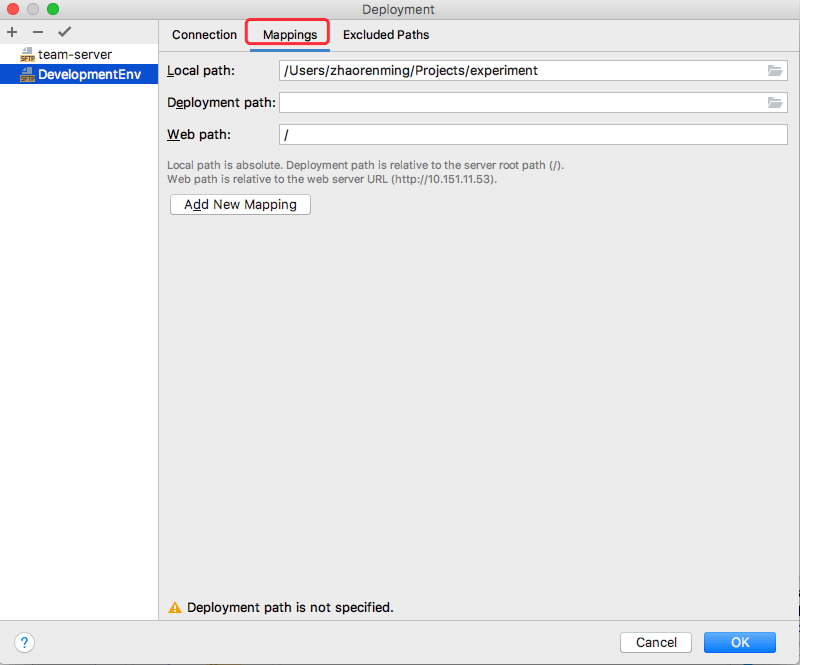
Click the "folder" icon to select the local and remote paths respectively.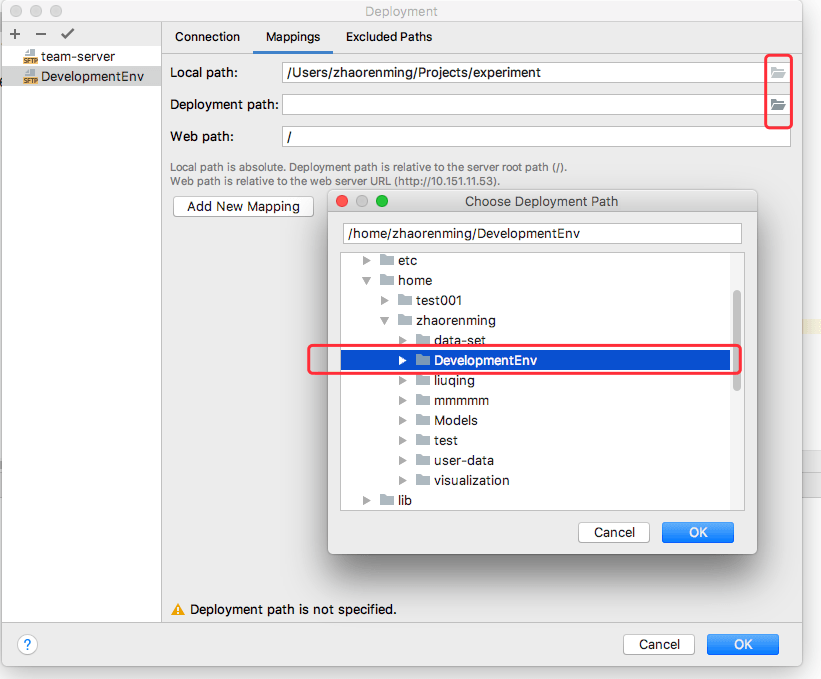
Set Local path to the path of the local code.
Set Deployment path to the path of the code within the AIStation development environment.
As shown in the figure.
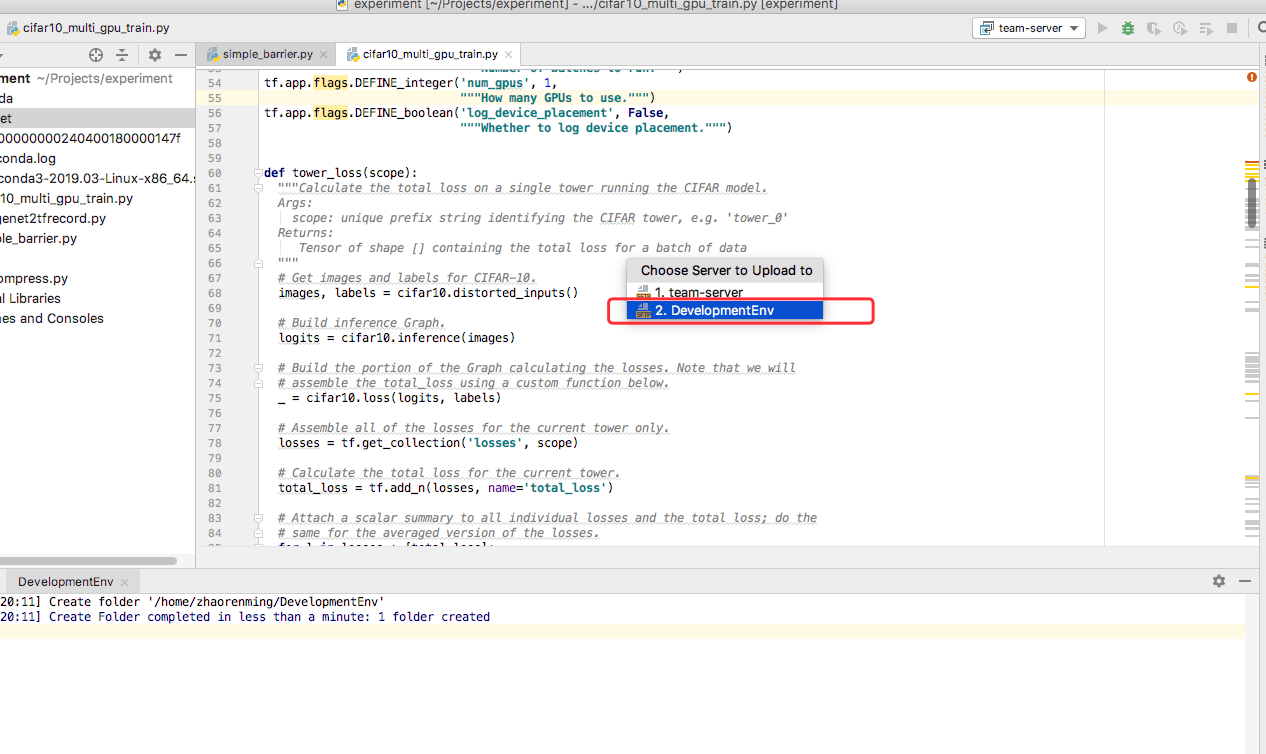
Right-click the corresponding code file or project folder in PyCharm, and select Deployment -> Upload to…
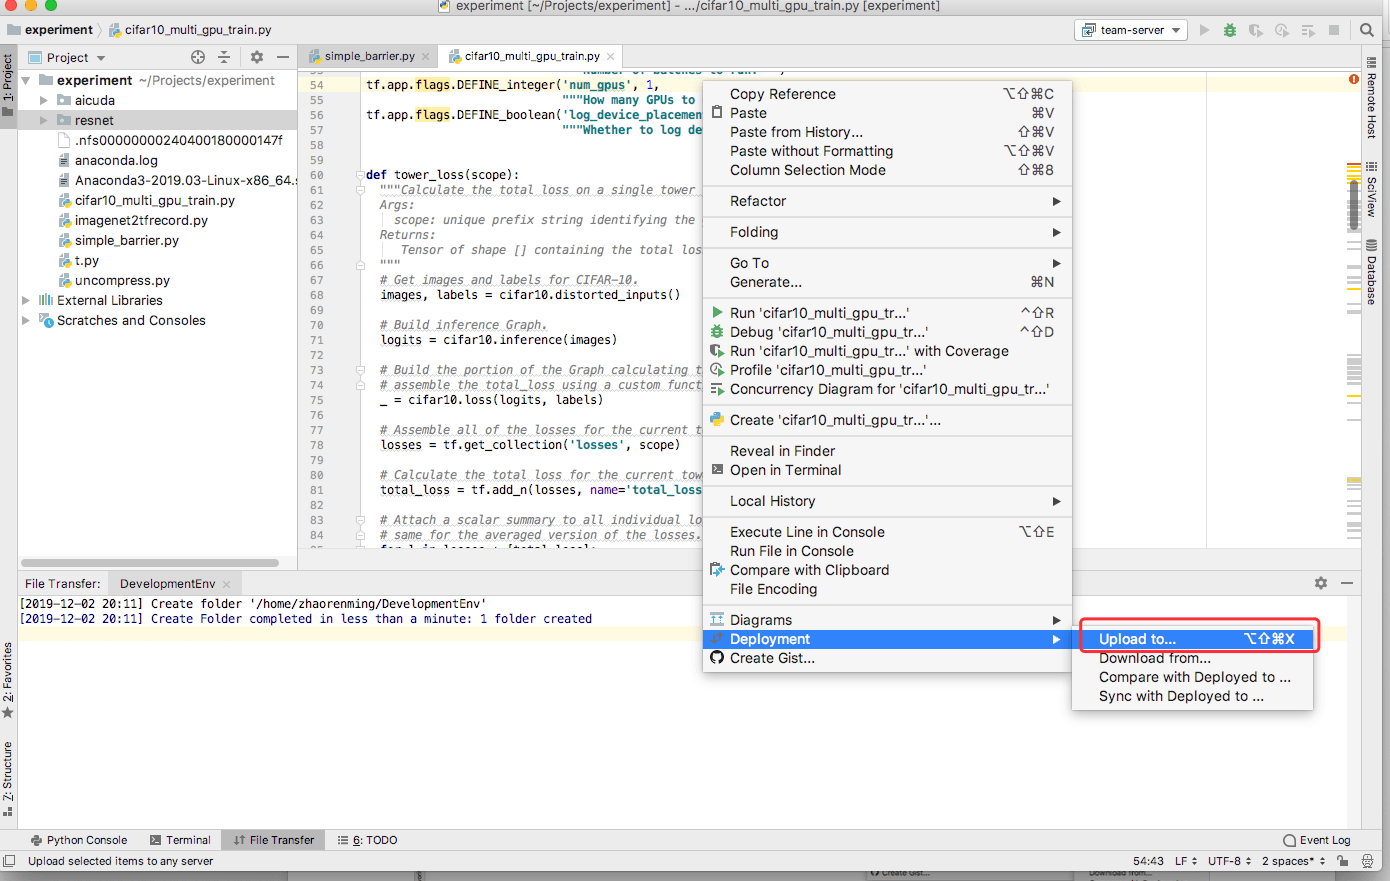
In the pop-up dialog, select the previously created Server configuration "DevelopmentEnv".
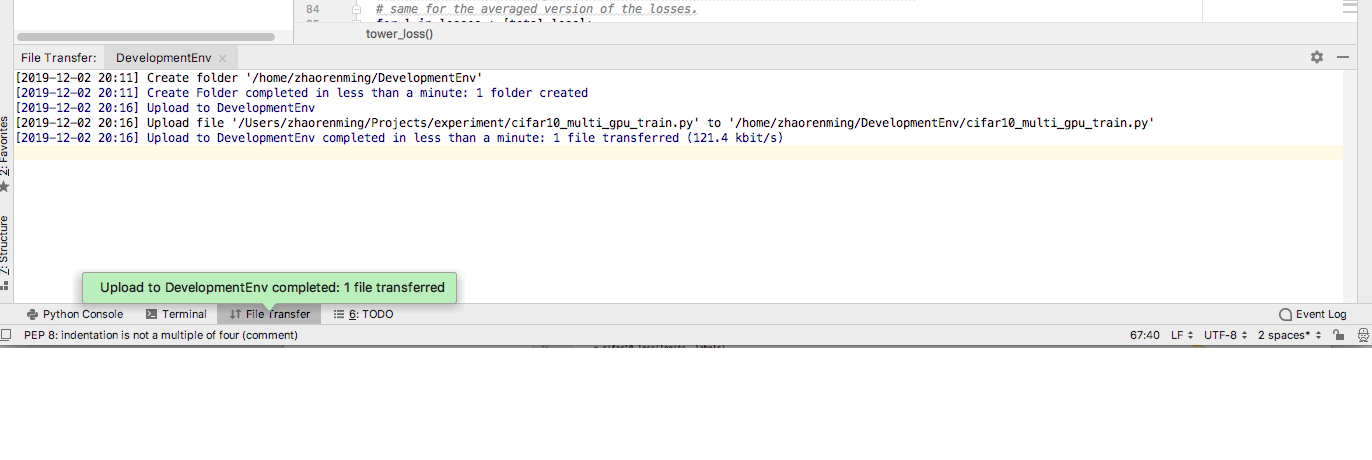
The following prompt indicates that the local code files have been uploaded to the corresponding directory in the AIStation development environment.
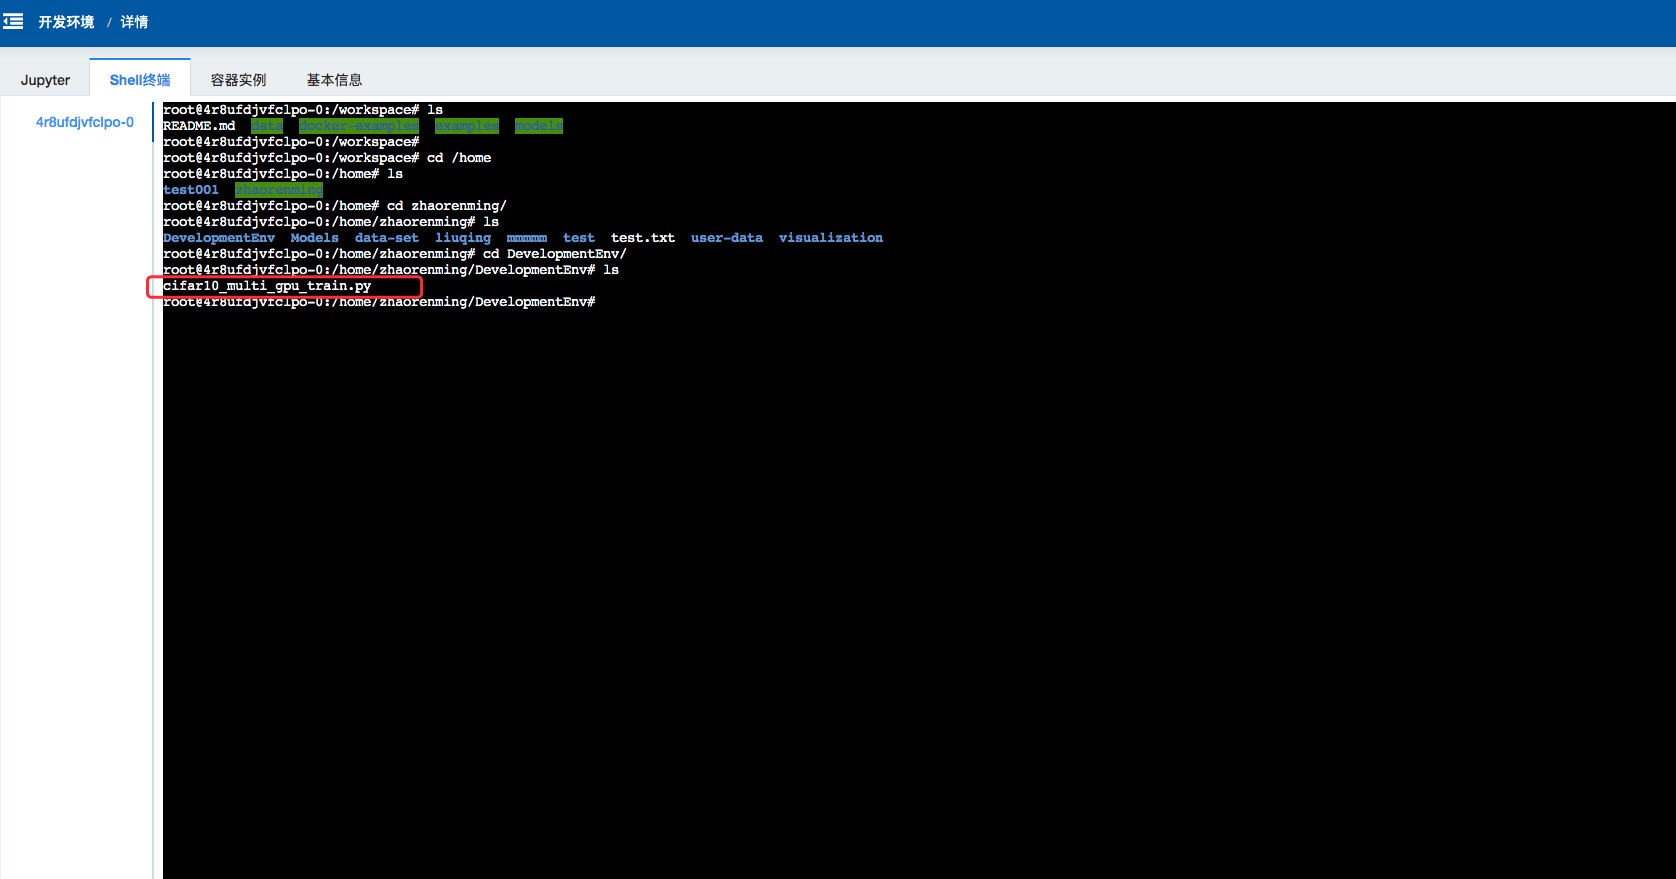
 View the development environment:
4. Configure Debug Packages in the Development Environment
The Debug package can be found on the operating system where PyCharm is installed.
Corresponding path in MacOS:
/Applications/PyCharm.app/Contents/debug-eggs/pycharm-debug-py3k.egg
/Applications/PyCharm.app/Contents/debug-eggs/pycharm-debug.egg
Corresponding path in Windows:
In the PyCharm installation directory \debug-eggs\ pycharm-debug-py3k.egg
In the PyCharm installation directory \debug-eggs\ pycharm-debug.egg
pycharm-debug.egg and pycharm-debug-py3k.egg correspond to local Python interpreters for Python 2 and Python 3, respectively.
For example, to debug a Python 3 program, copy pycharm-debug-py3k.egg to the development environment (you can upload it using the scp command or tools like Xftp or FileZilla).
scp -P SSH_PORT pycharm-debug-py3k.egg root@SSH_HOST:/home/USERNAME/DevelopmentEnv
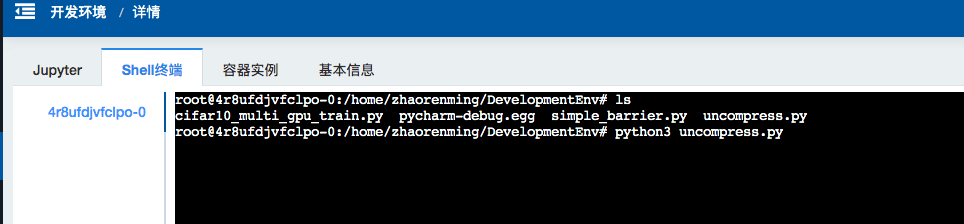
In the development environment, run easy_install pycharm-debug-py3k.egg to install it.
Run pip install pydevd
5. Configure Remote Debug
Click Run -> Edit Configurations...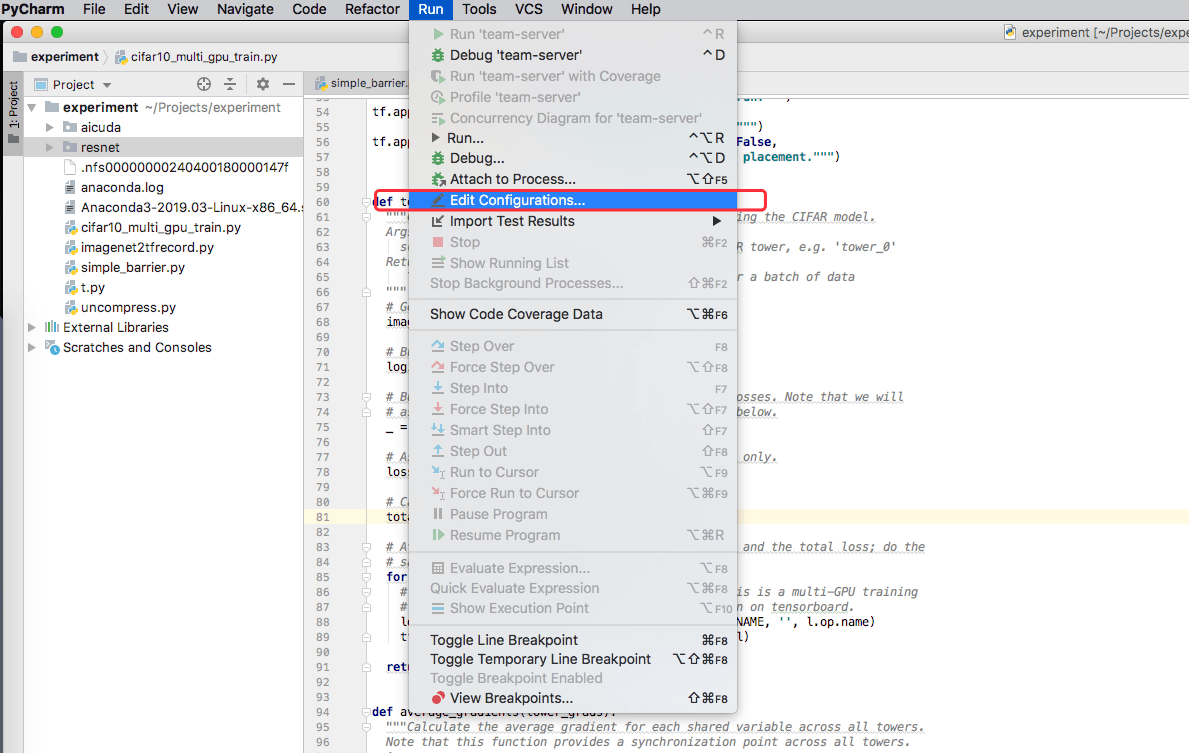 In the dialog box that appears, click the "+" icon in the upper-left corner. Select "Python Remote Debug".
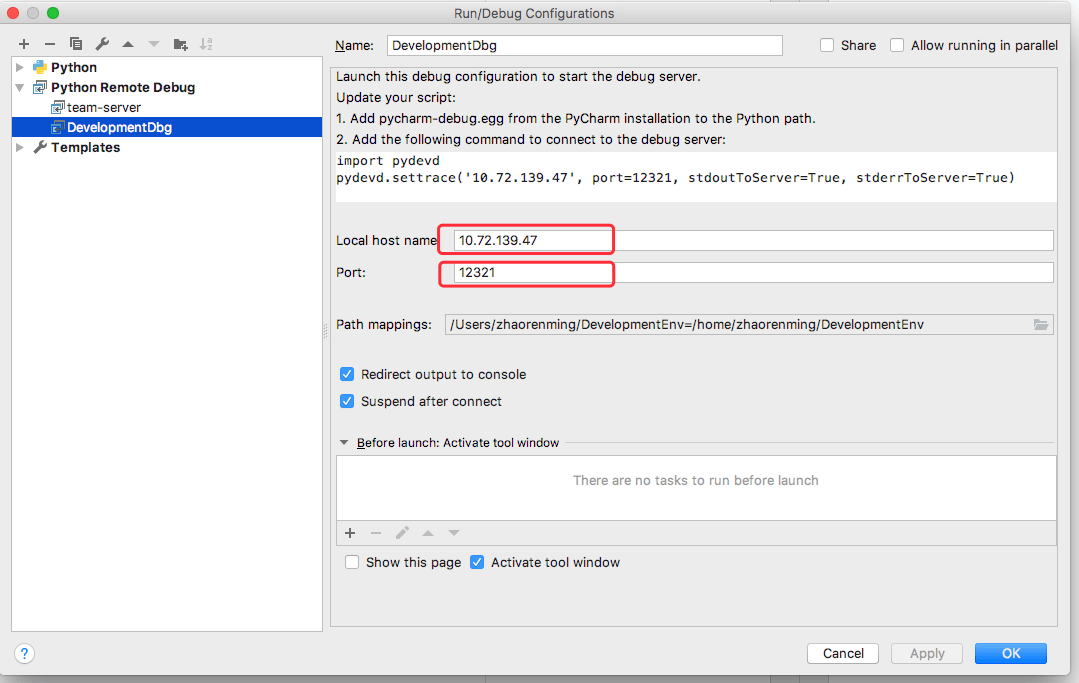
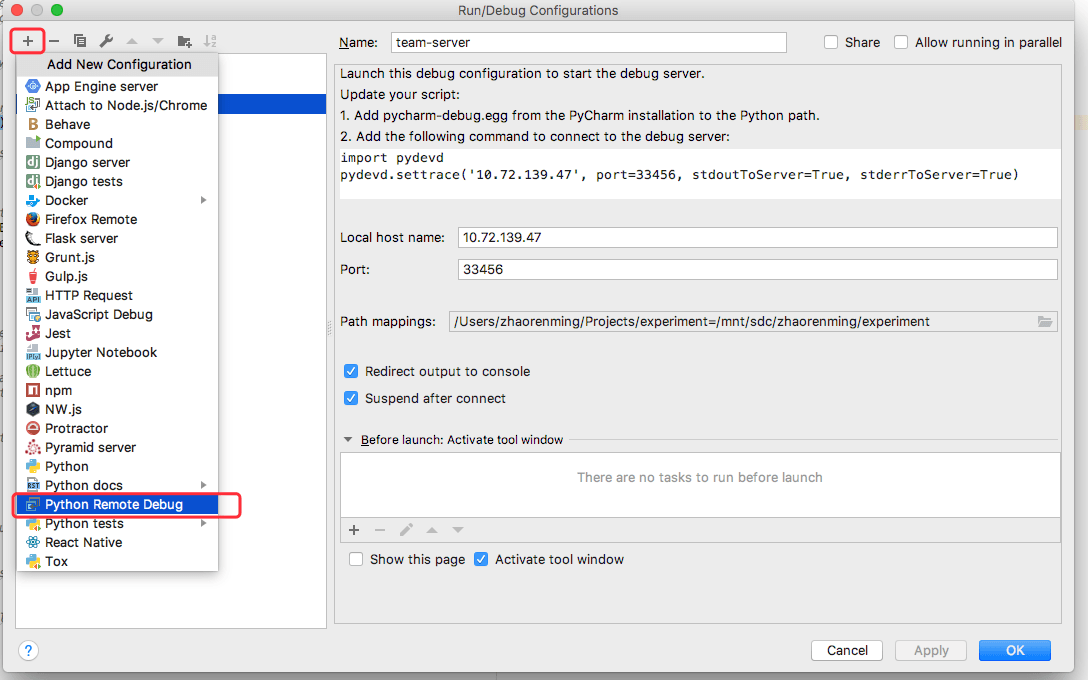 Name this configuration DevelopymentDbg. Enter your local IP address in the Local host name field, and enter an available local port in the port field.
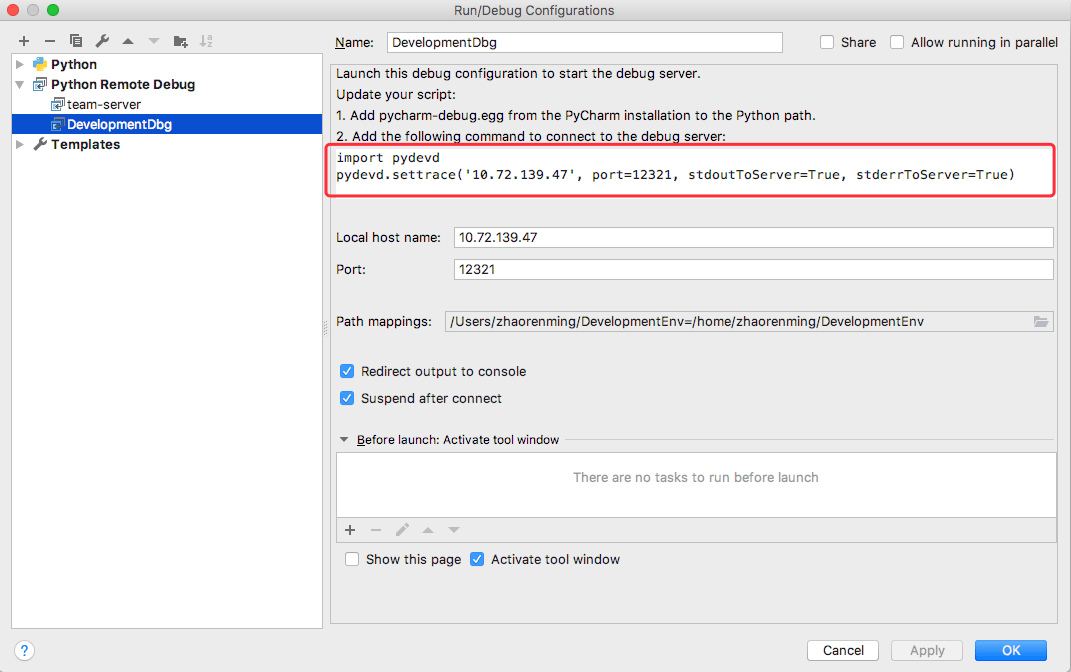
 Copy the two lines of code in the red box and add them to your program.
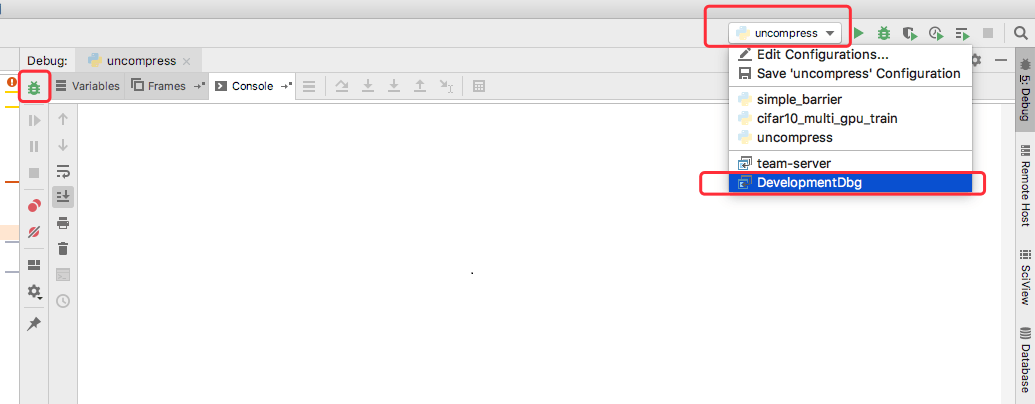
 Click the dropdown menu shown in the red box and select the DevelopmentDbg configuration you just created. Then click the green debug icon button.
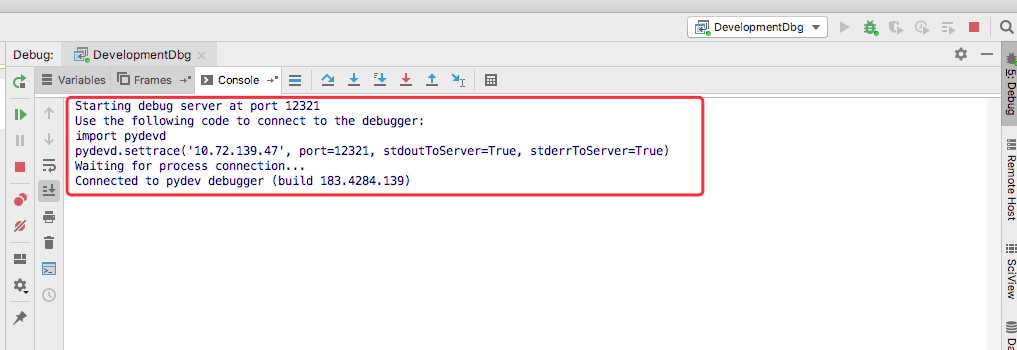
 When the console displays "Waiting for process connection... Connected to pydev debugger", enter the development environment to proceed.
 Enter the development environment and run python3 uncompress.py.
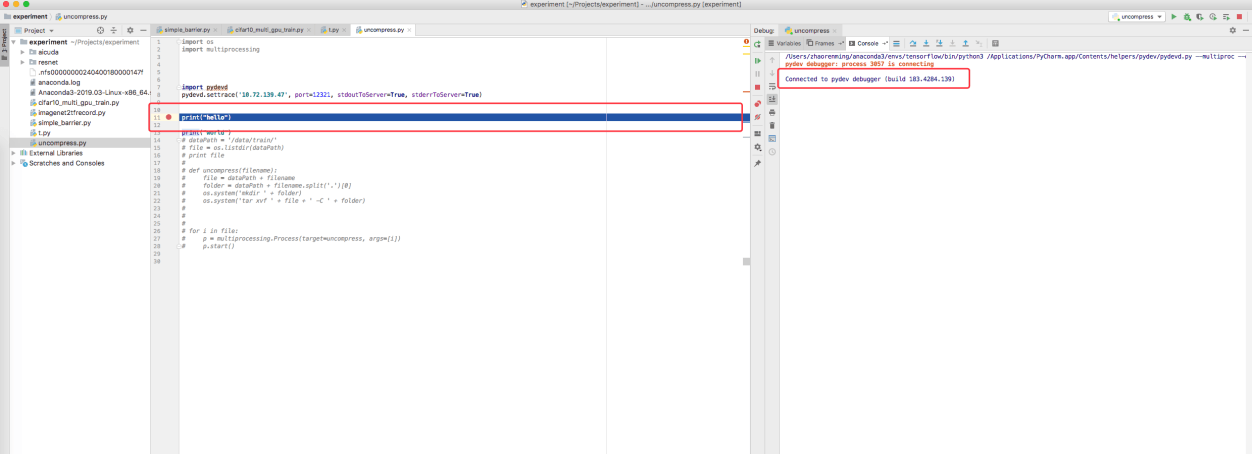
PyCharm displays the following, with the program paused at the first breakpoint, ready for remote debugging.
Enter the development environment and run python3 uncompress.py.
PyCharm displays the following, with the program paused at the first breakpoint, ready for remote debugging.